GIS Connection Guides
This documentation page outlines the steps required to access the WMS and WFS layers from the Pavement Management System on the GIS platforms listed below.
Notes on the connection string
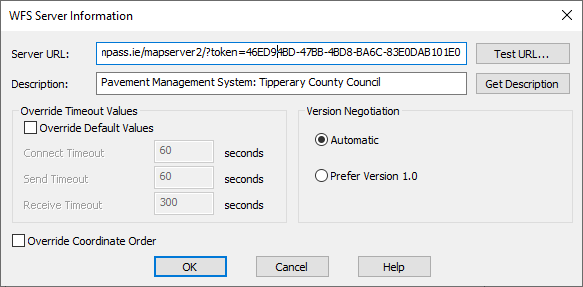
As part of the PMS 5.5 release in May 2022 an extra level of security, utilising security tokens, has been added to the PMS mapping services. As of this release users will now need to update their connection URLs to include these tokens. Tokens are generated on a user-by-user basis by administrators at the RMO. They consist of a string of characters, numbers and hyphens:
240a1b58-2222-48a5-9d44-8050a4a8f745
In the connection string they are prefixed with a URL parameter:
?token=
Up to now the URL for Galway City used would have been:
https://galwaycity.maproadpms.ie/mapserver2
As of this change, the URL will now need to include the new URL parameter & token:
https://galwaycity.maproadpms.ie/mapserver2?token=240a1b58-2222-48a5-9d44-8050a4a8f745
Software specific connection instructions
ArcPro (WMS)
On the Insert tab, select the Connections drop-down list and click New WMS Server.
The Add WMS Server Connection dialogue box appears. Enter the URL of the WMS server site you want to connect to in the Server URL text box. The URL varies depending on the site configuration.
If the WMS server you are connecting to has additional capabilities so you can add custom request parameters specific to this WMS server as a parameter list. Be aware that ArcGIS Pro will not be able to validate these additional parameters. Type your user name and password, if appropriate.
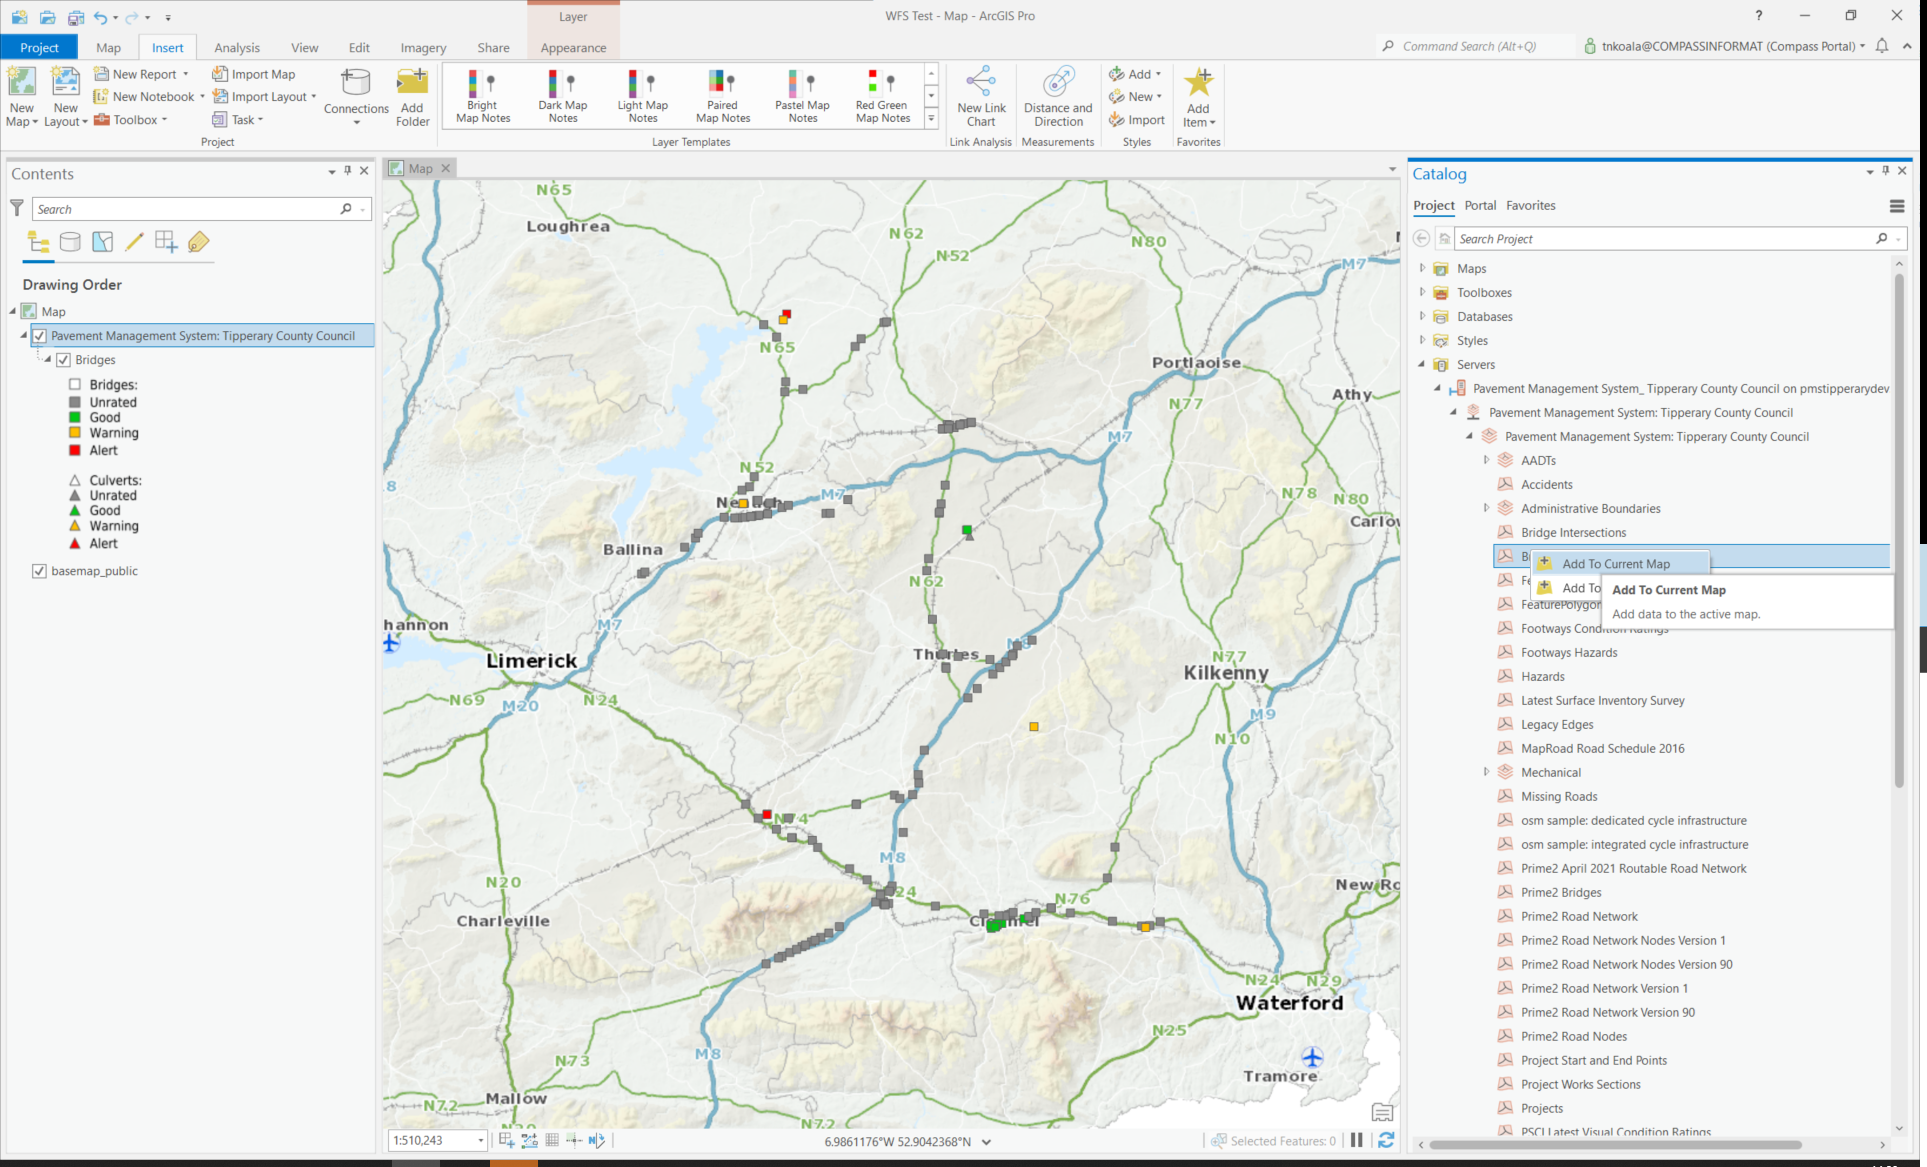
The catalog pane will contain the layer list for the connected WMS.
Right-click a layer from the list in the catalog pane and select add to current map to display the WMS raster image.
ArcPro (WFS)
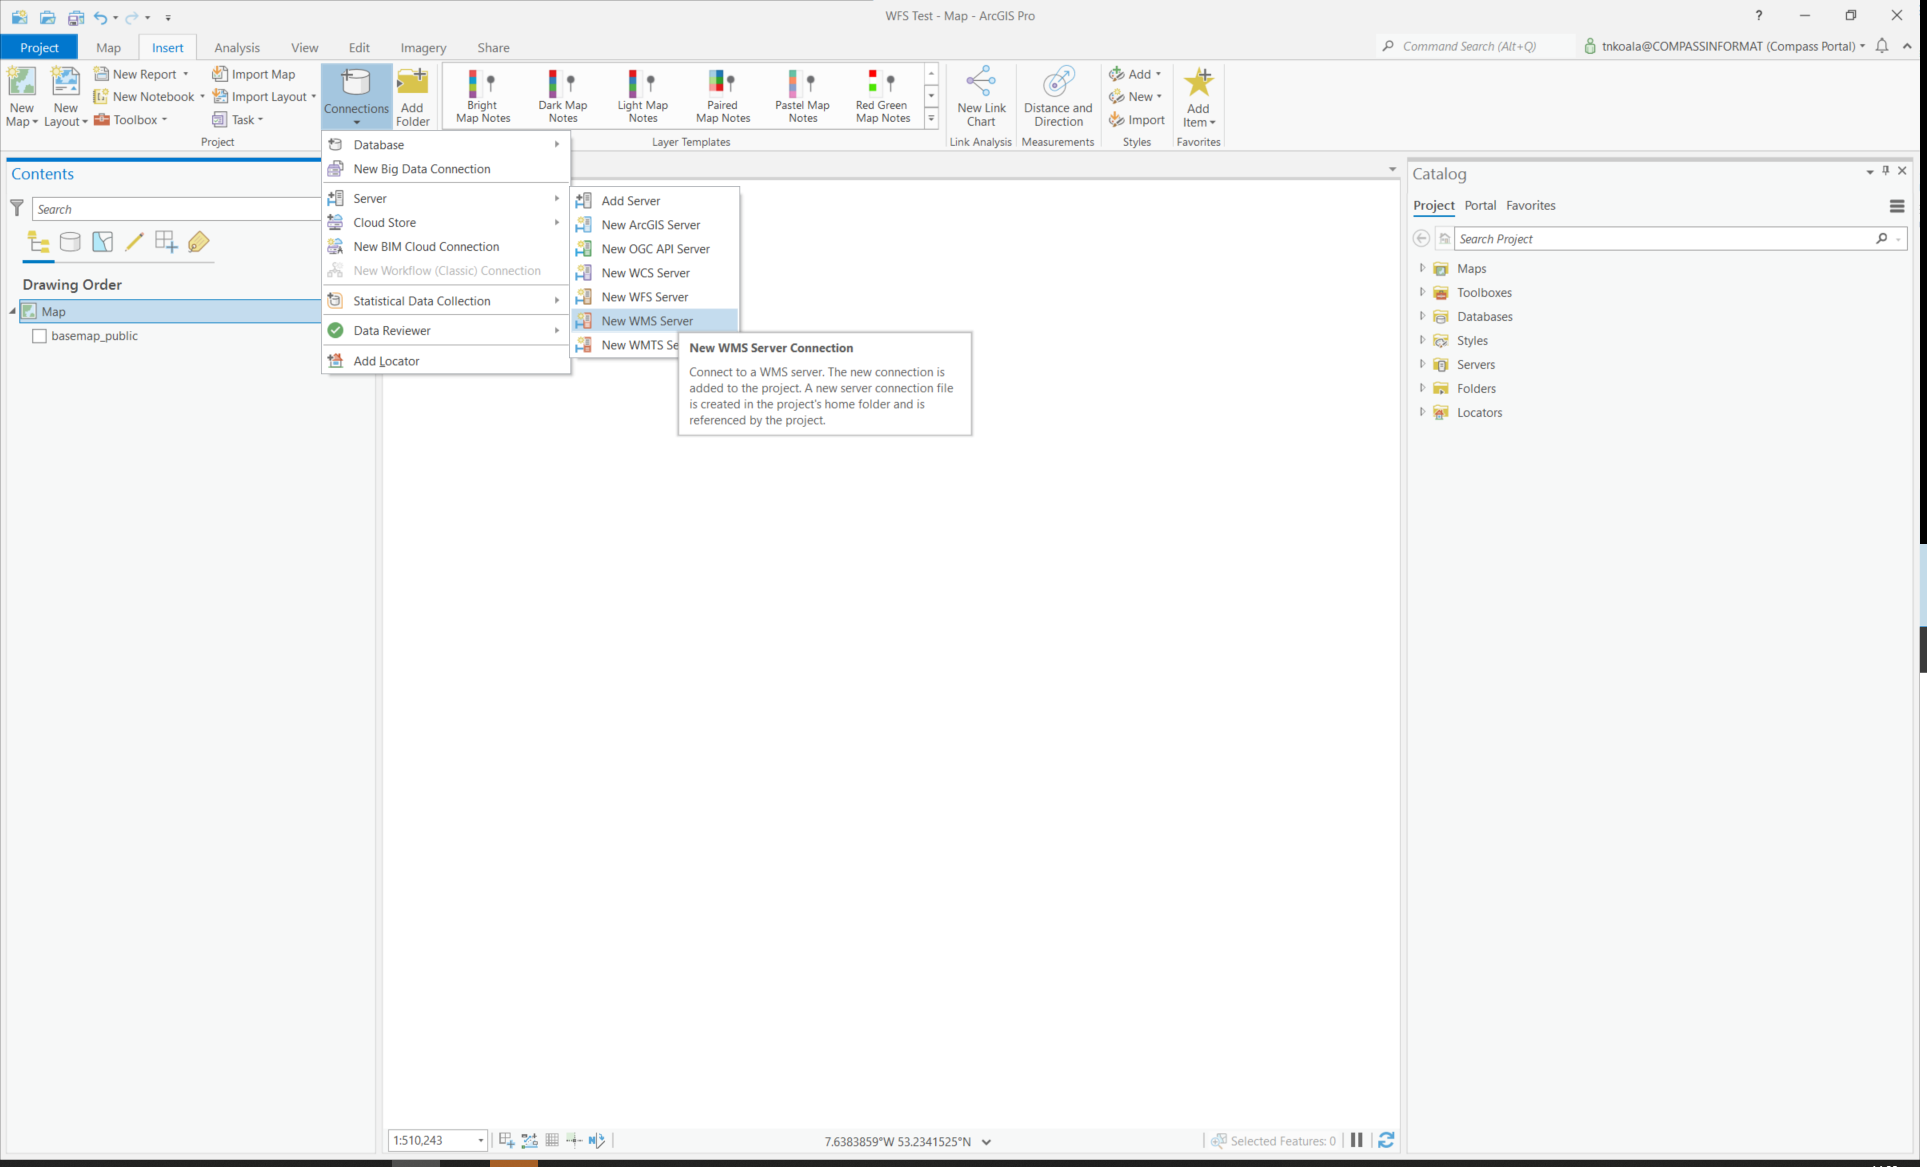
On the Insert tab, select the Connections drop-down list and click New WFS Server.
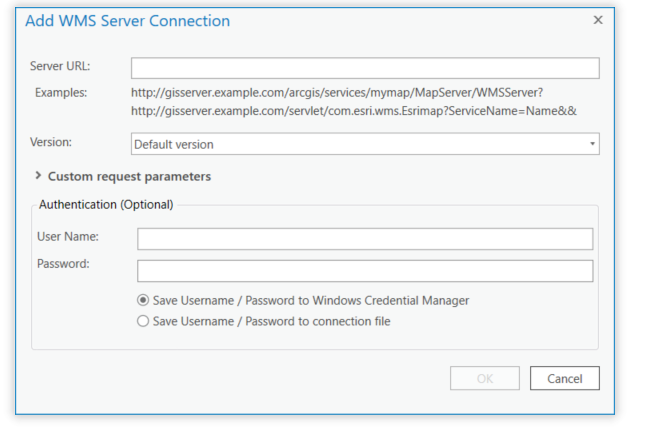
The Add WFS Server Connection dialog box appears. Enter the URL of the WFS server site you want to connect to in the Server URL text box. The URL varies depending on the site configuration.
If the WFS server you are connecting to has additional capabilities so you can add custom request parameters specific to this WFS server as a parameter list. Be aware that ArcGIS Pro will not be able to validate these additional parameters. Type your user name and password, if appropriate.
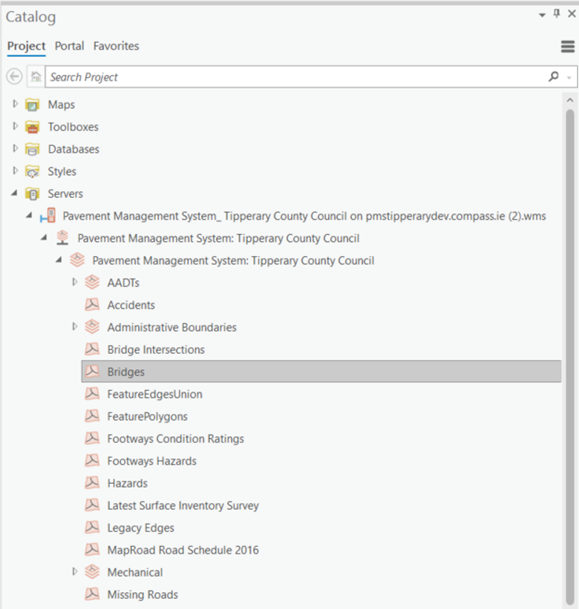
The catalog pane will contain the layer list for the connected WFS.
Right-click a layer from the list in the catalog pane and select add to current map to display the WFS layer.
ArcMap 10.8 (WMS)
Click the Add Data button on the Standard toolbar to open the Add Data dialog box.
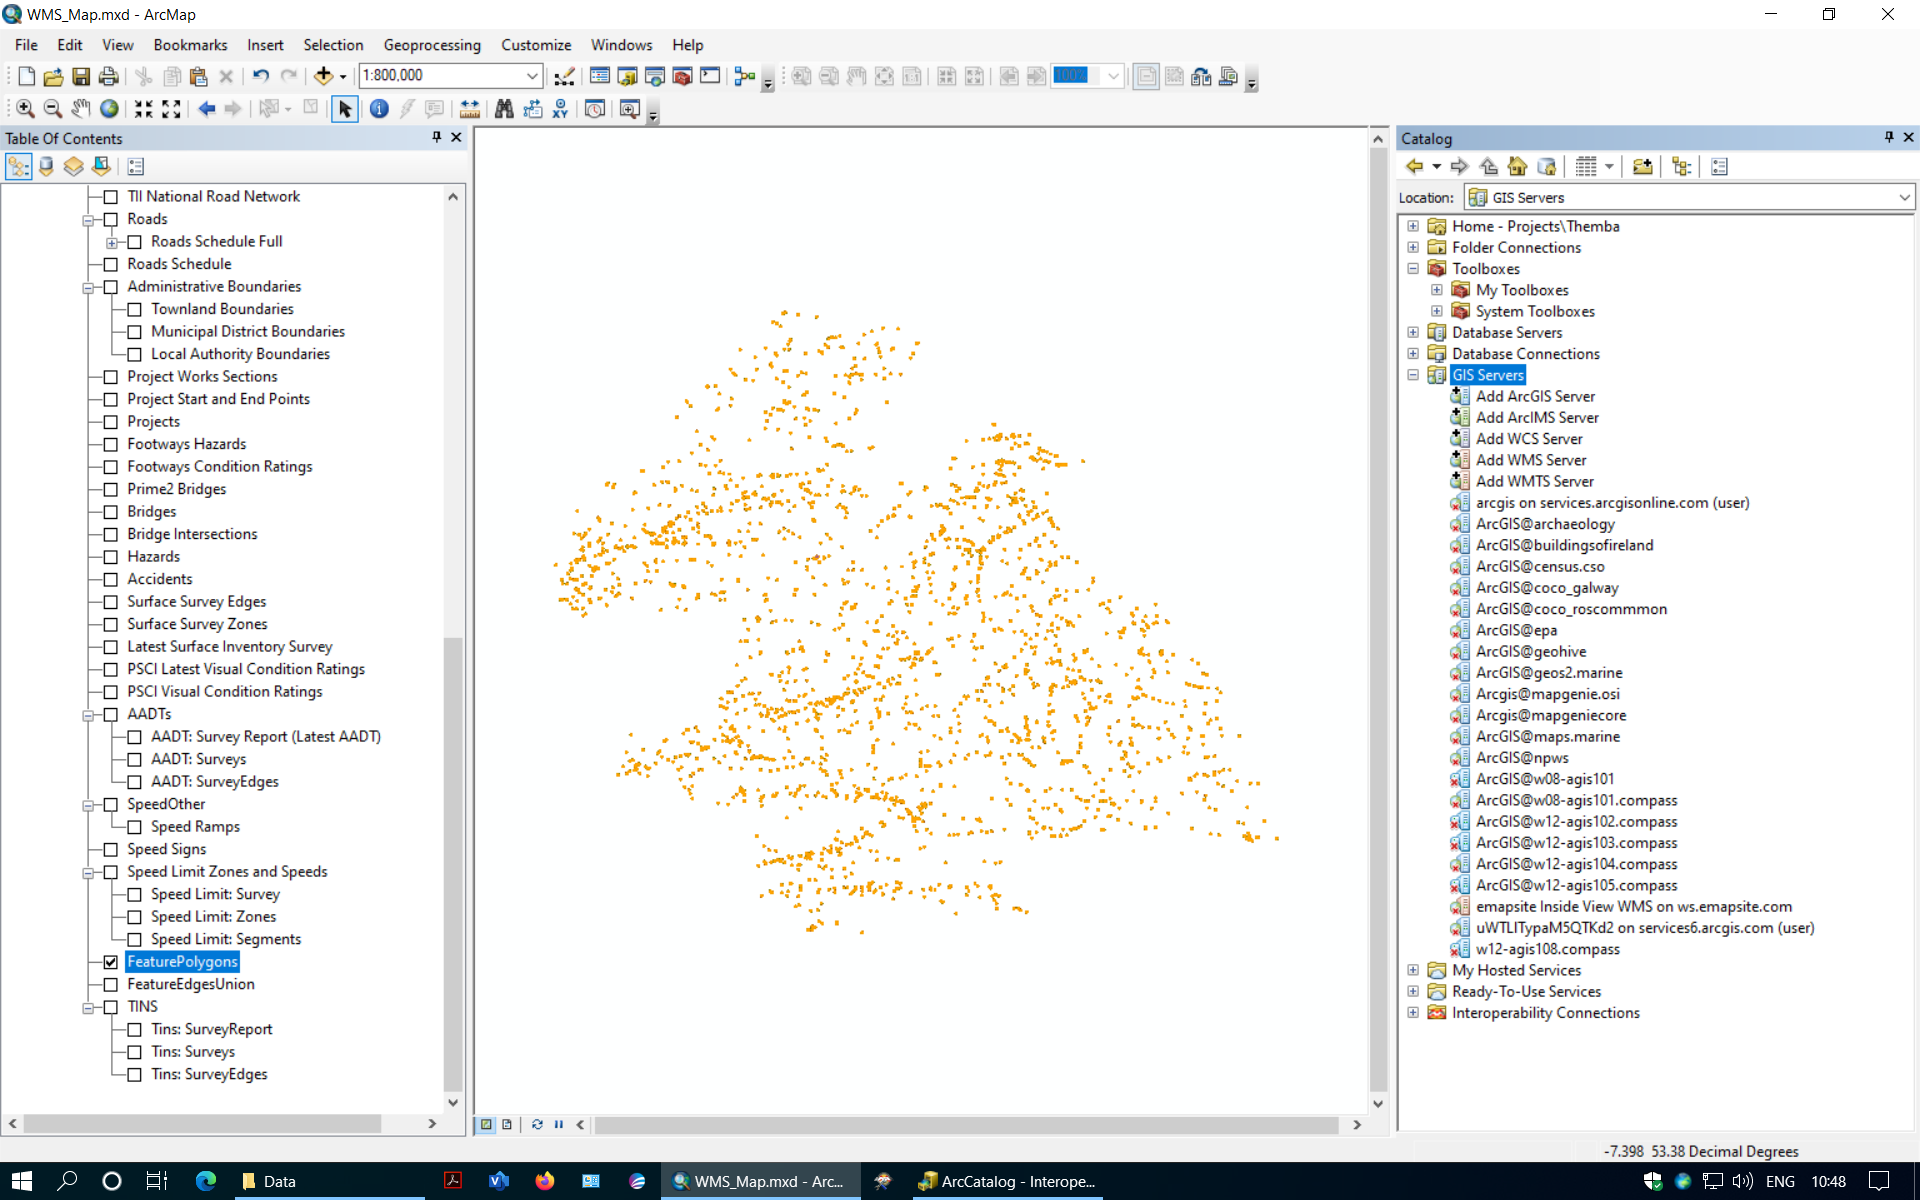
If previously connected, open the catalog pane and choose GIS Servers. This gives you a list of servers you have previously used.
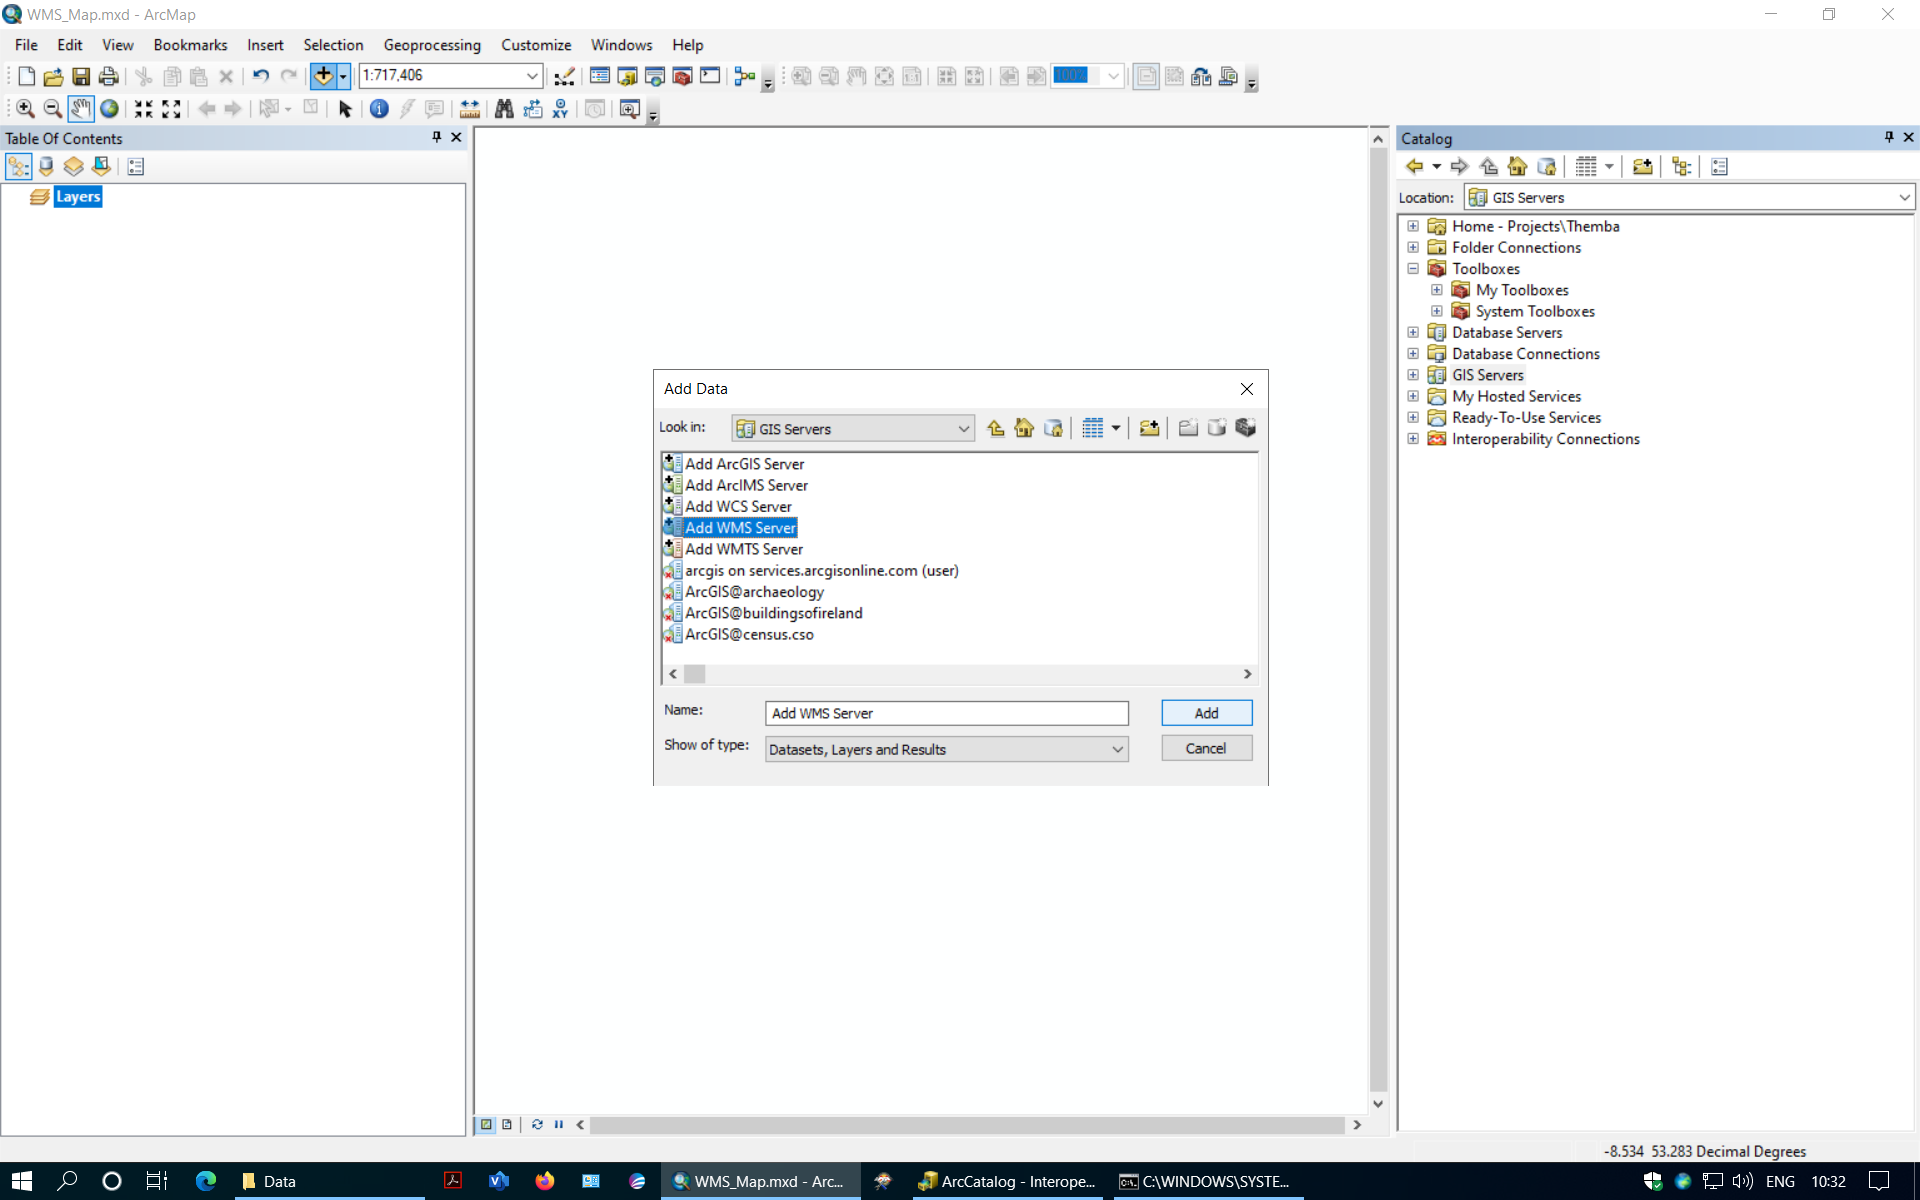
If the server you want is not listed, you can connect to a WMS server.
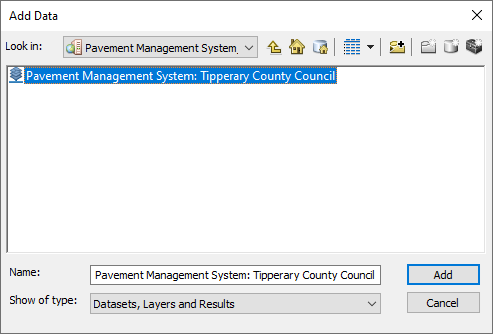
After connecting to a WMS server, the service is shown in the Add Data dialog box with this icon: WMS Service. Select this service, or double-click to access each of the WMS service sublayers, and select a specific sublayer.
Click Add.
Click the Add Data button on the toolbar to open the Add Data dialog box and select the new WMS service in GIS Servers folder.
The service is added as a map layer. Data is loaded and selectable in the table of contents panel.
ArcMap 10.8 (WFS)
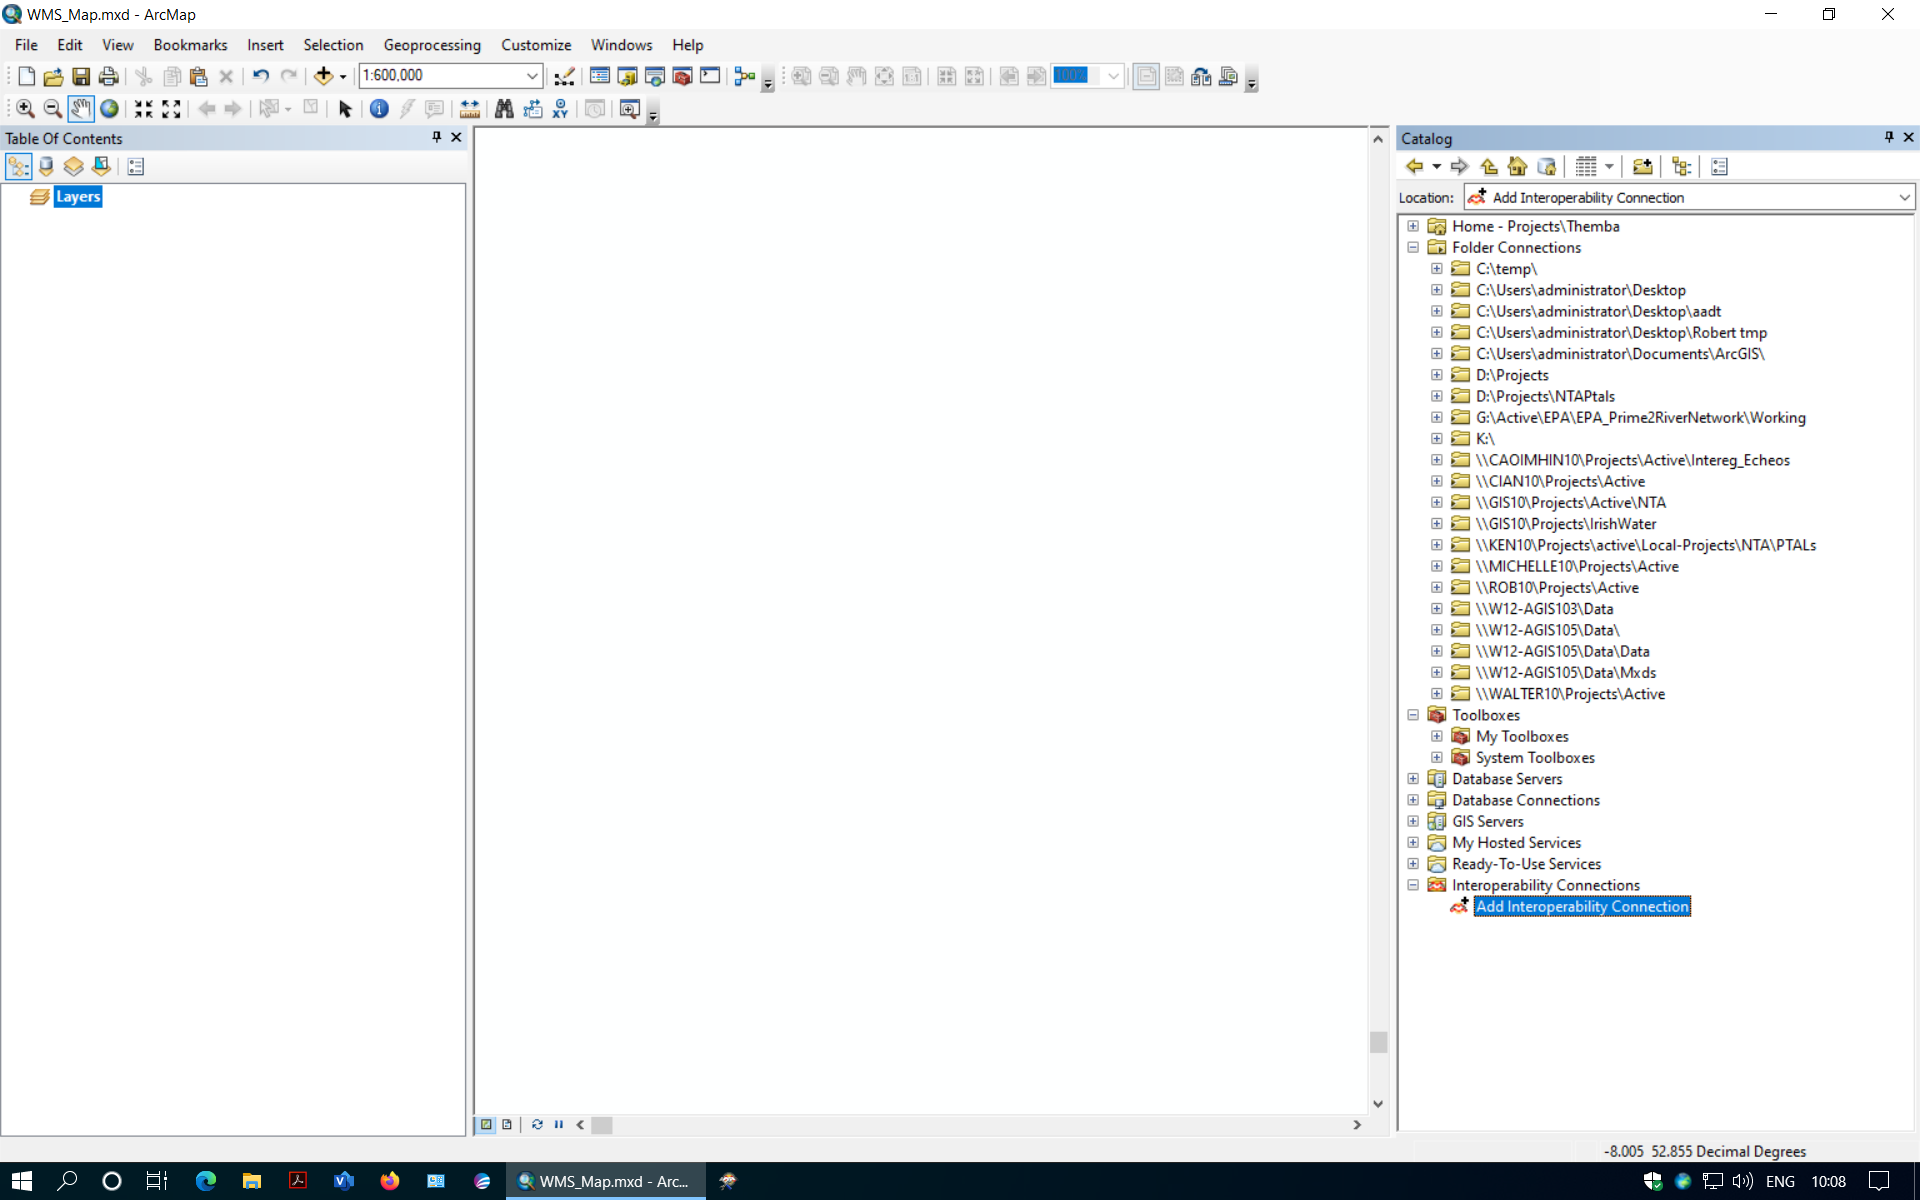
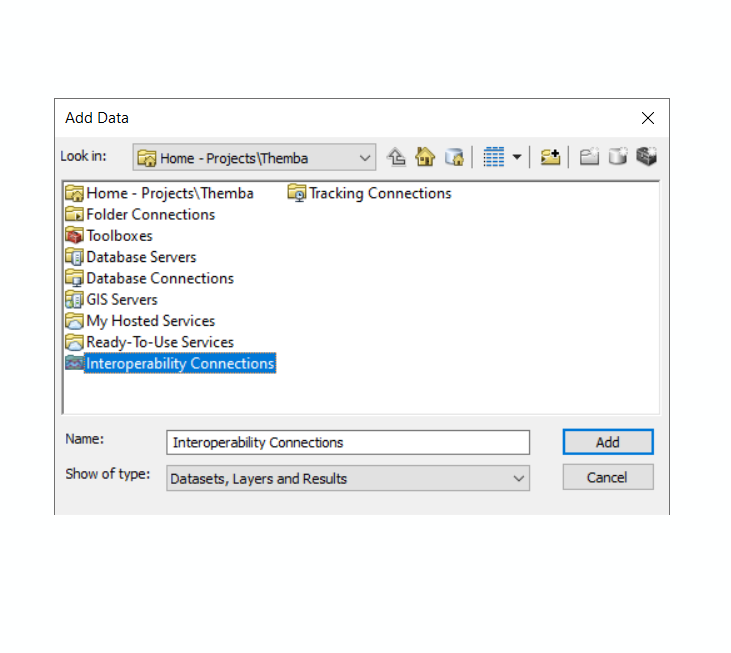
Data Interoperability extension is required to access WFS connection using arcmap 10.8. This extension needs to be enabled and installed before any connection can be made.
Select the Add Interoperability in the catalog panel.
If the server you want is not listed, you can connect to a WMS server.
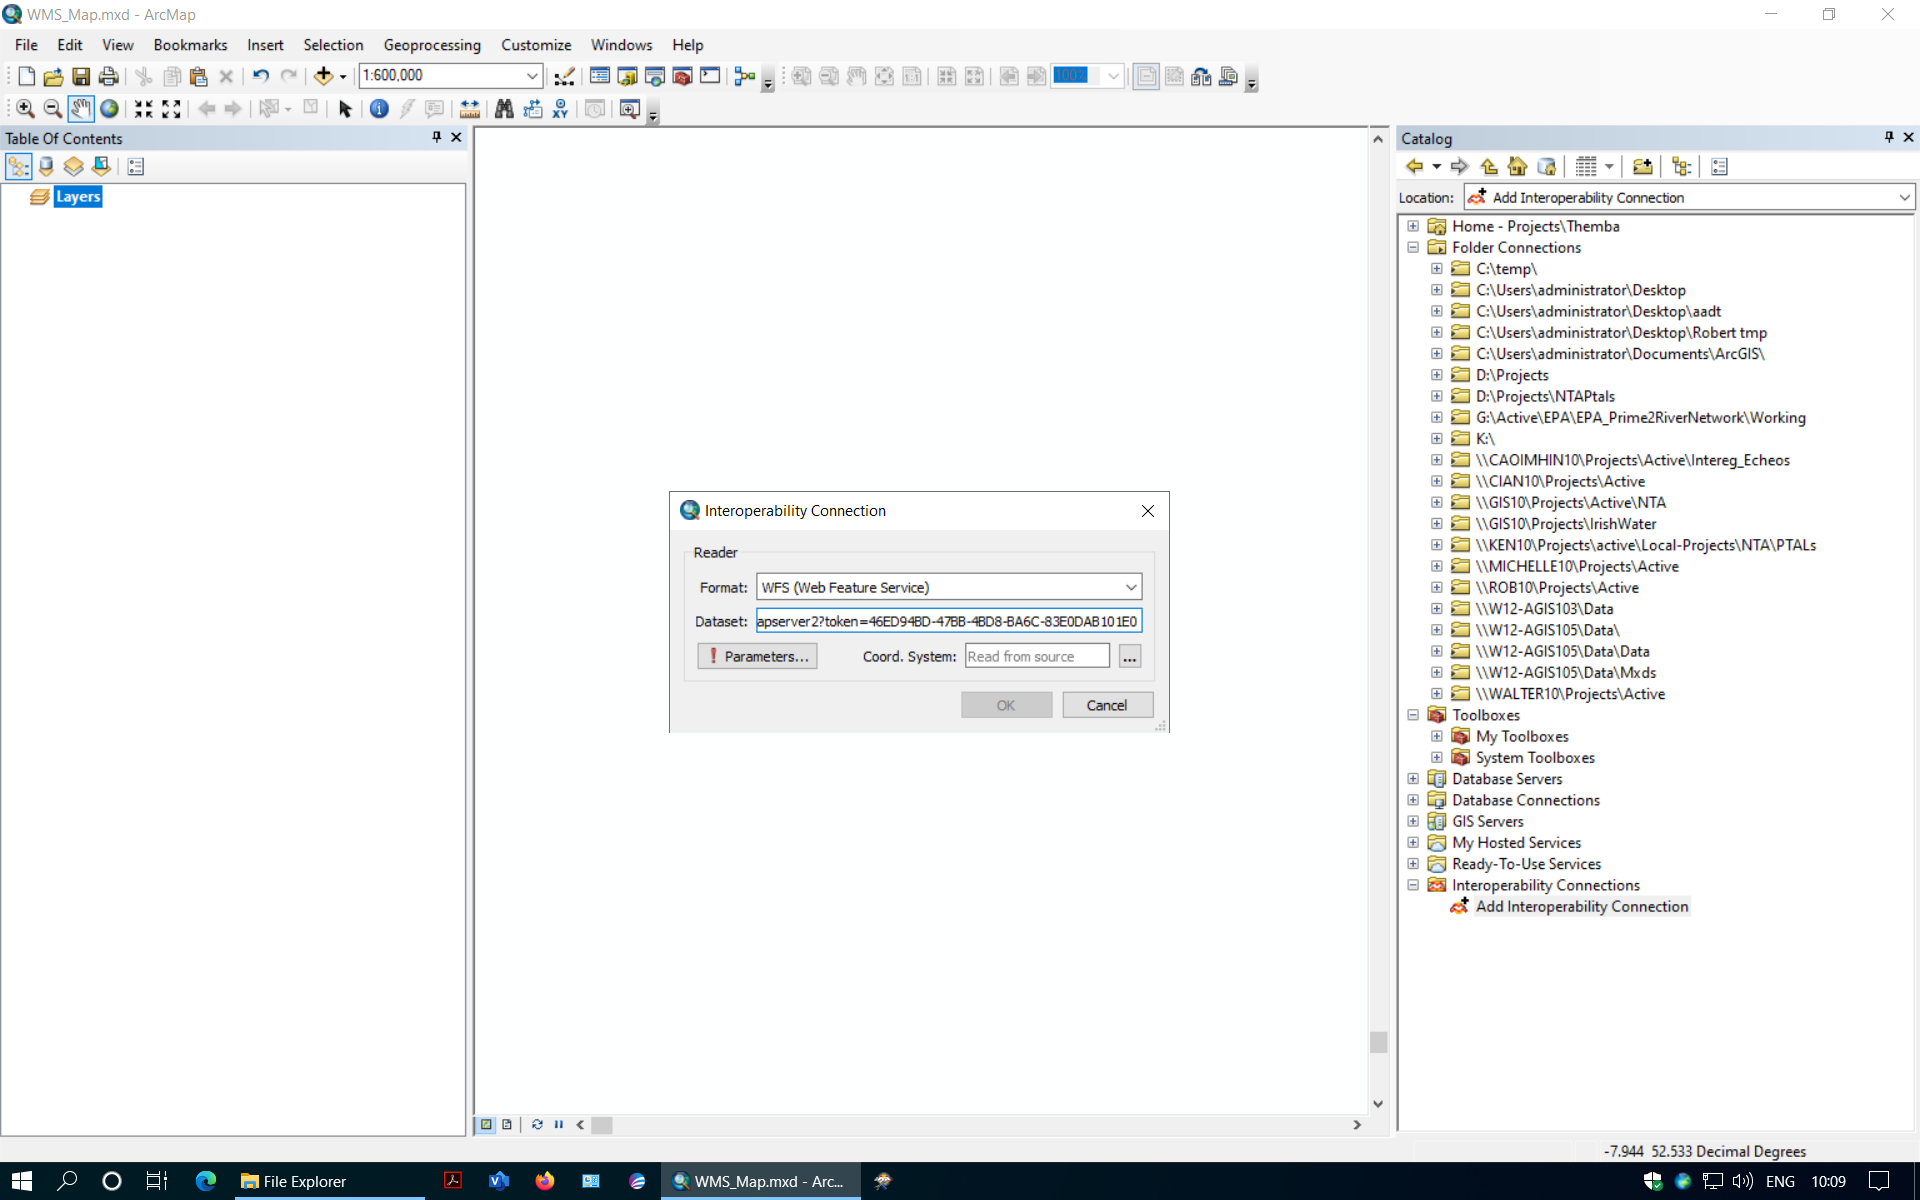
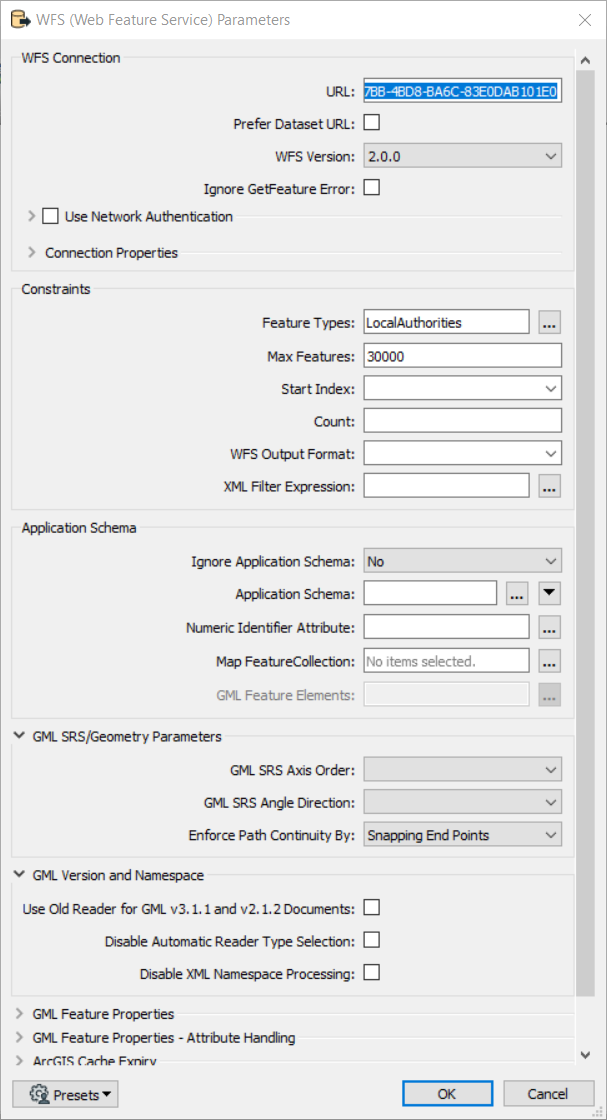
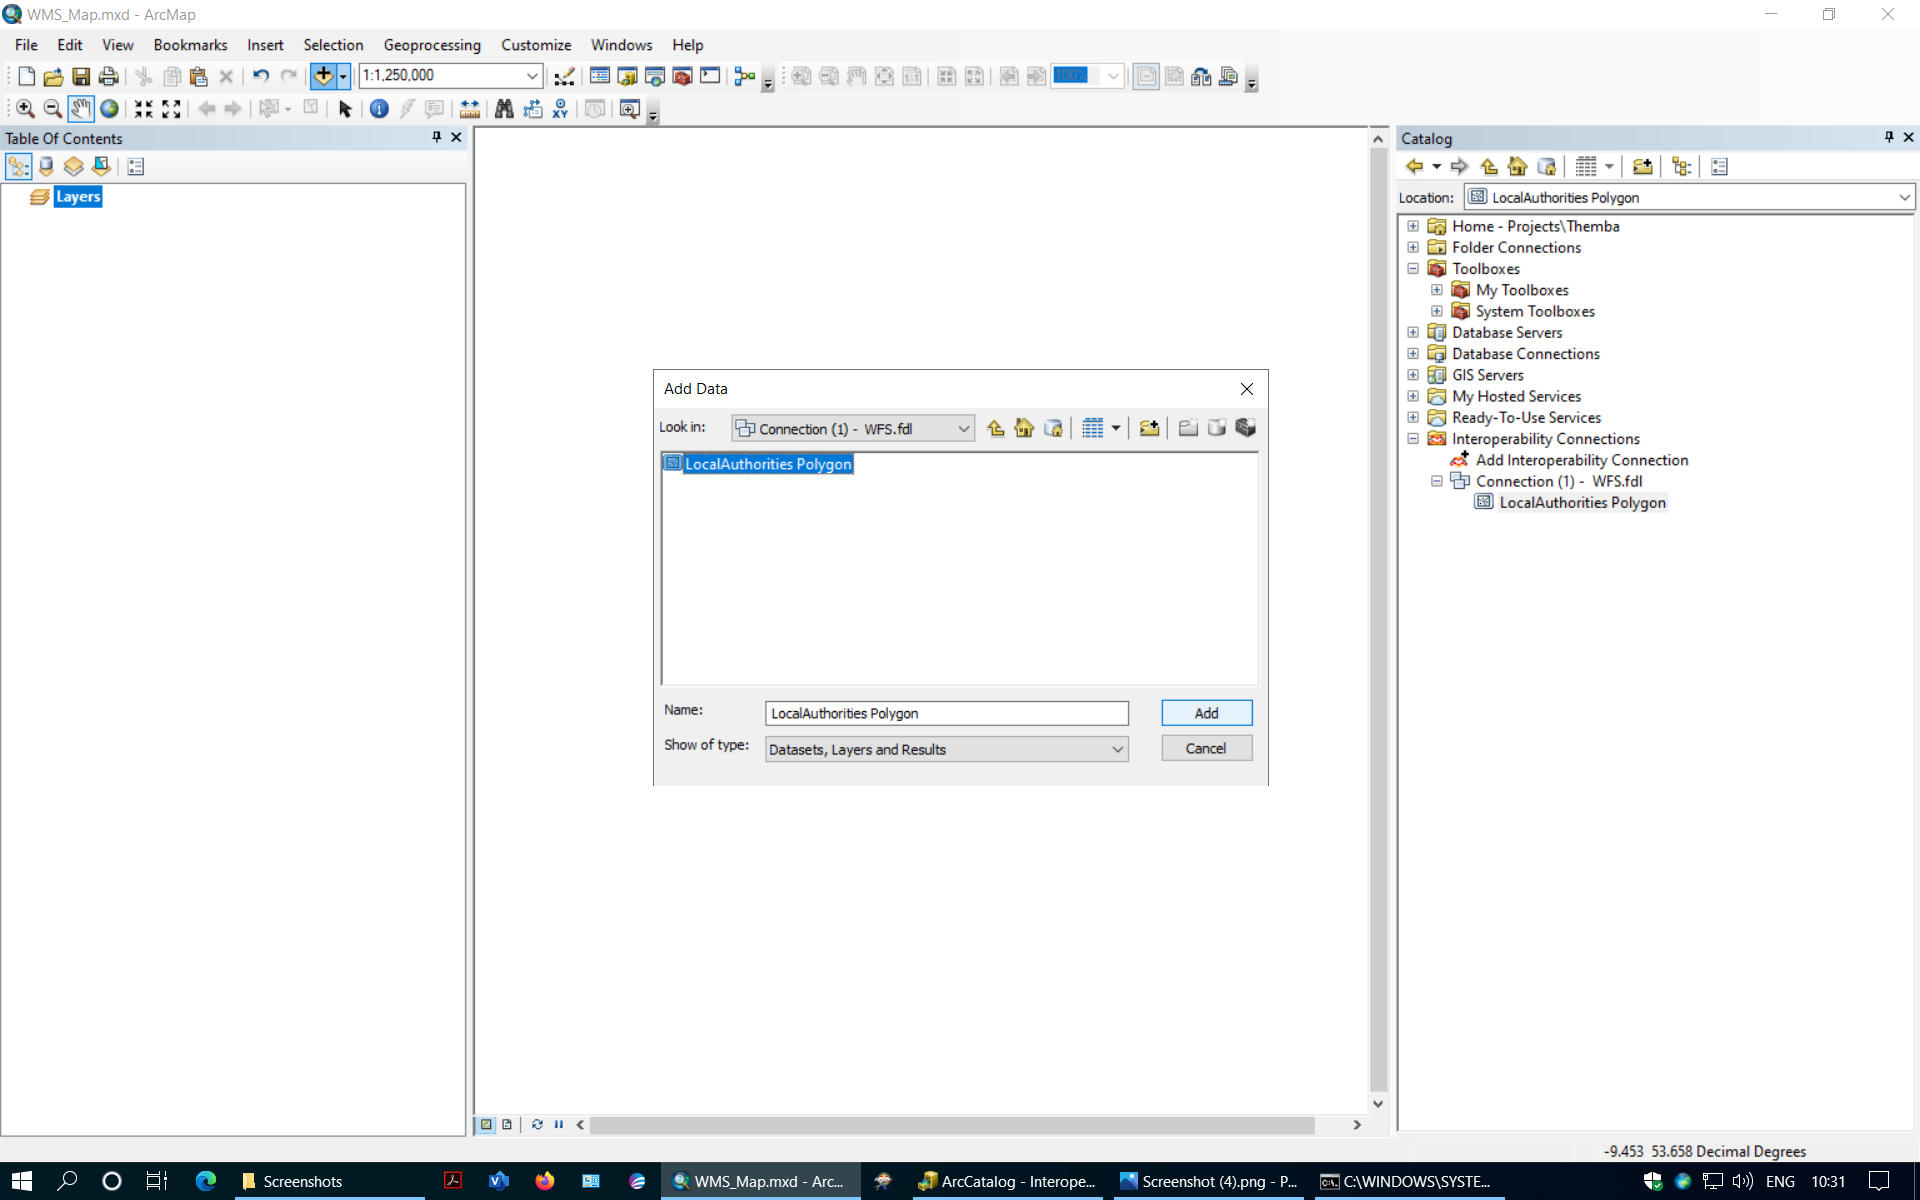
Select the WFS format of the features that will be accessed with the service connection and enter the WFS URL. Click ok and the parameters to view a list of layers available and additional settings.
Select WFS Version 2.0 and select one feature type. Click Ok to add the connection.
Click the Add Data button on the toolbar to open the Add Data dialog box.
Select the new WFS layer in data interoperability connection and add to the map.
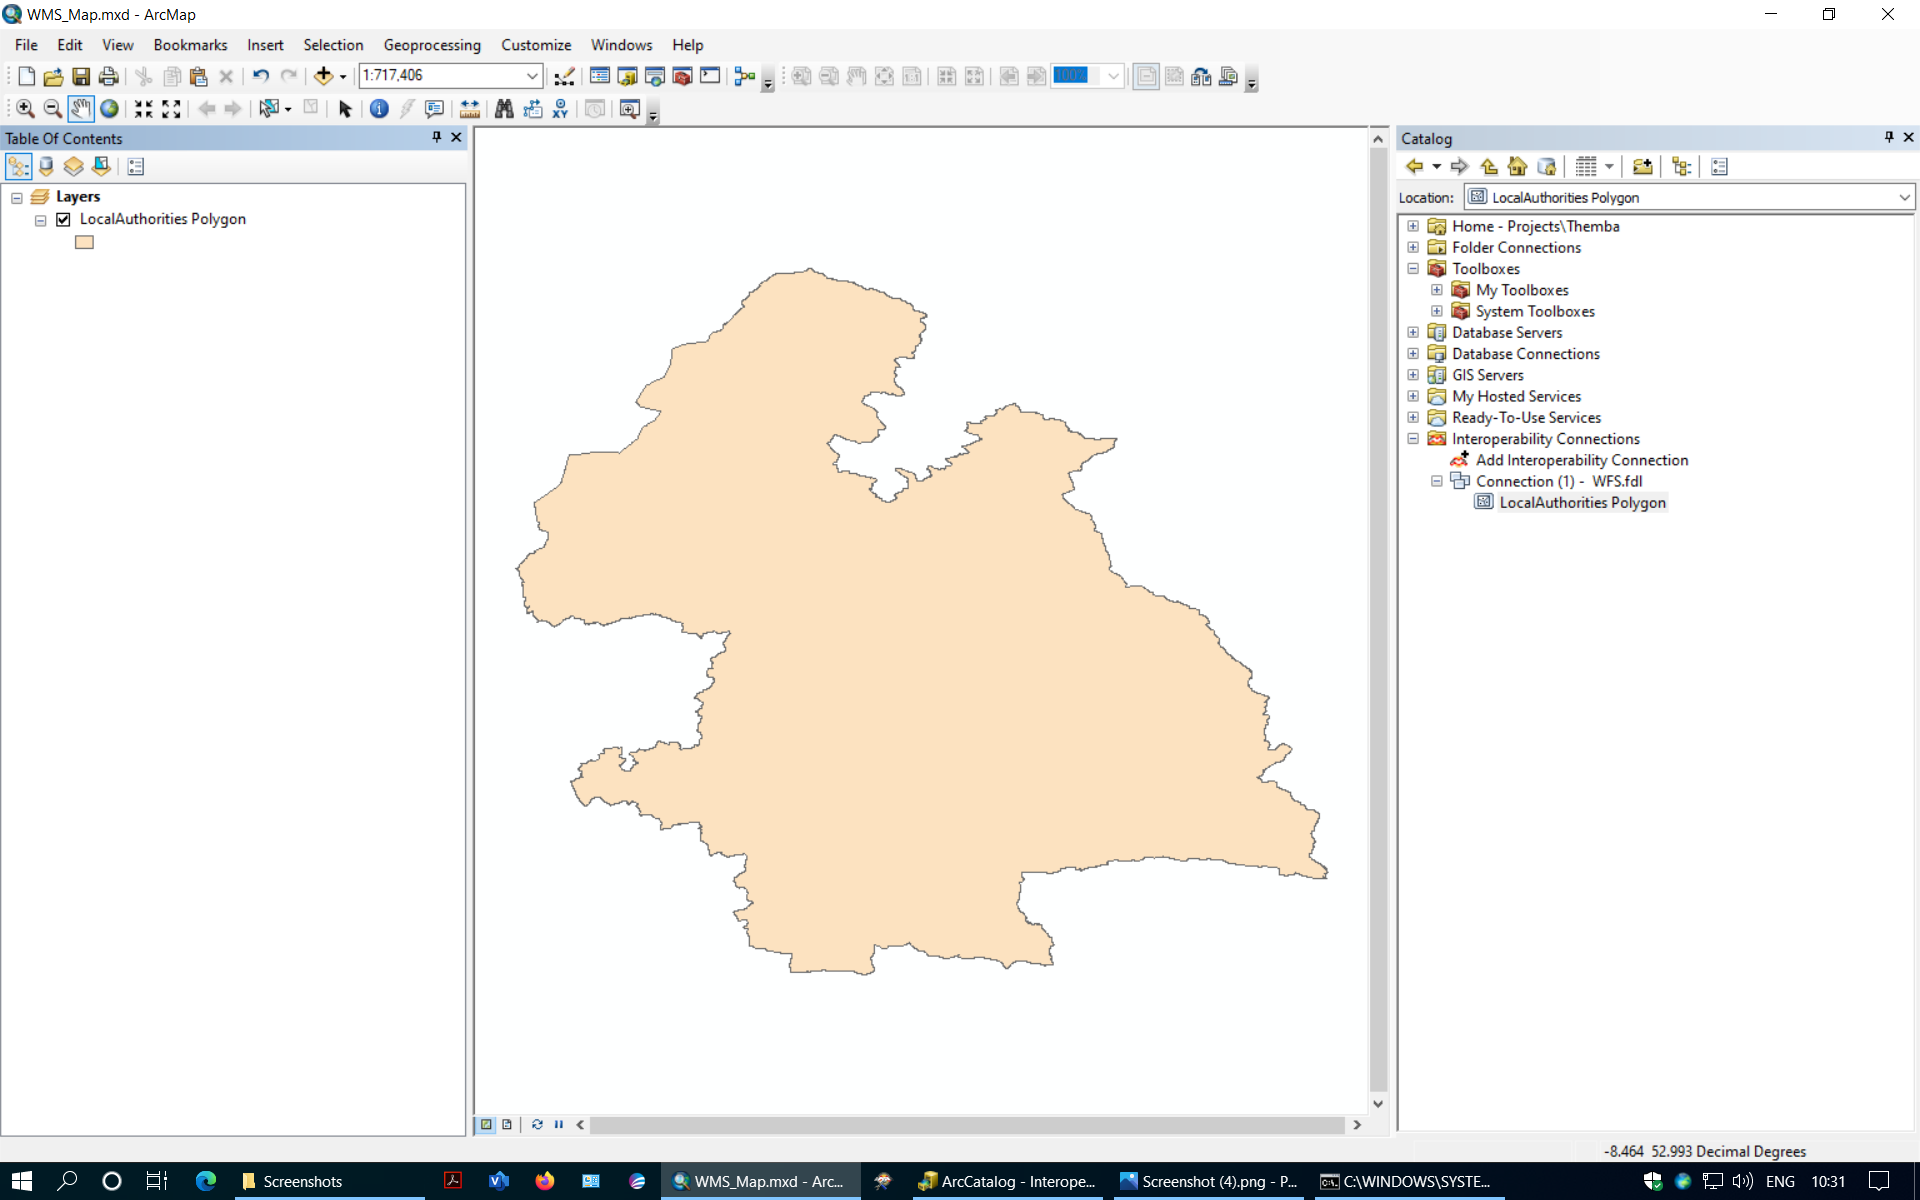
The layer is added as a map layer. Data is loaded and selectable in the table of contents panel.
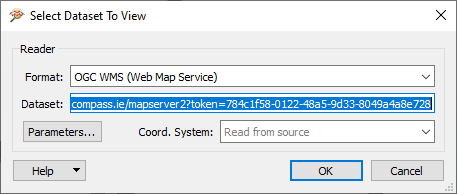
MapInfo (WMS)
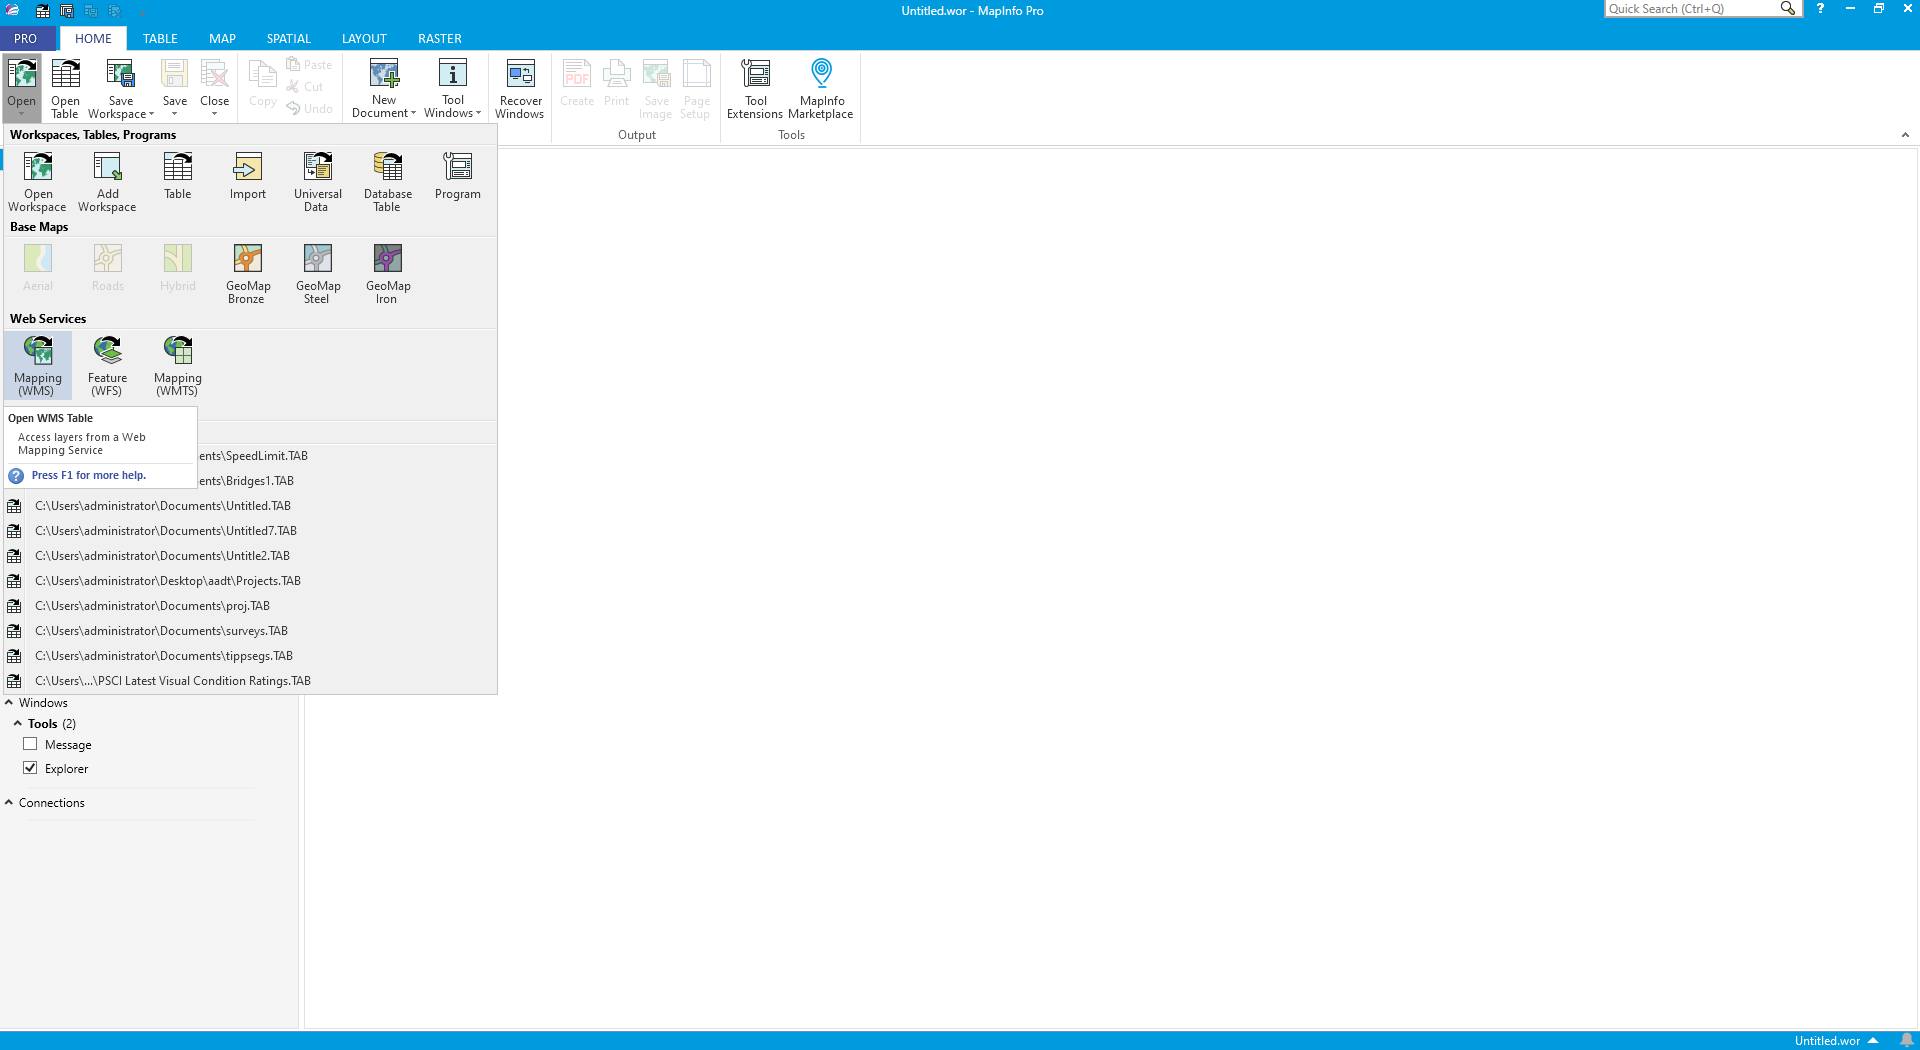
On the toolbar, click the Open drop-down list and click open WMS.
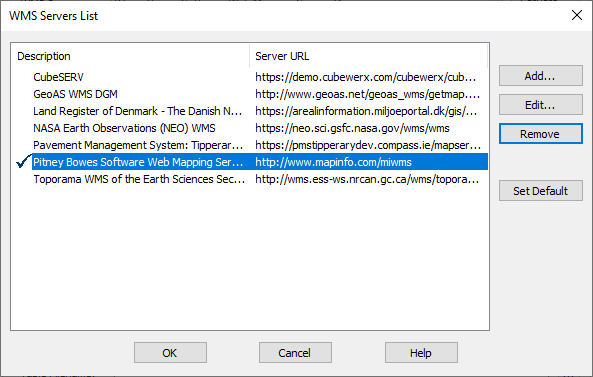
In the WMS connection dialogue, click on Servers…
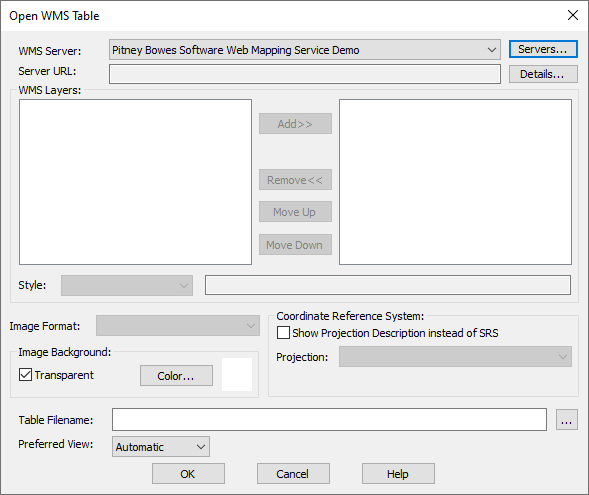
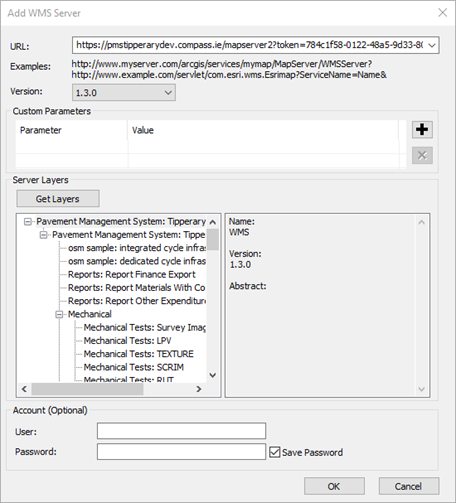
The WMS Server Connections dialog box appears. Select the add button to add a new WMS server.
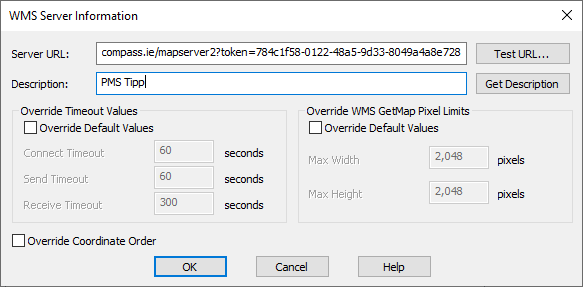
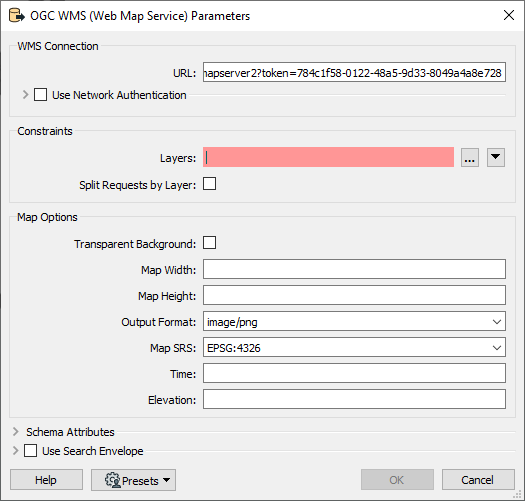
Enter the URL of the WMS server site you want to connect to in the Server URL text box. Enter a name for the server which will be displayed.
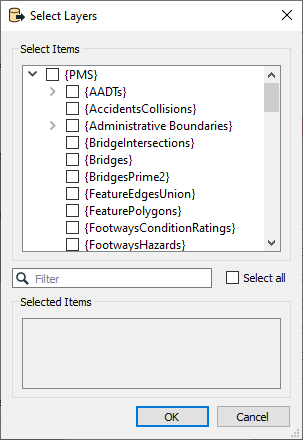
The WMS Server Connections dialog box appears with the WMS server and associated layers in the layer list.
Add all layers that are required and rename the table created.
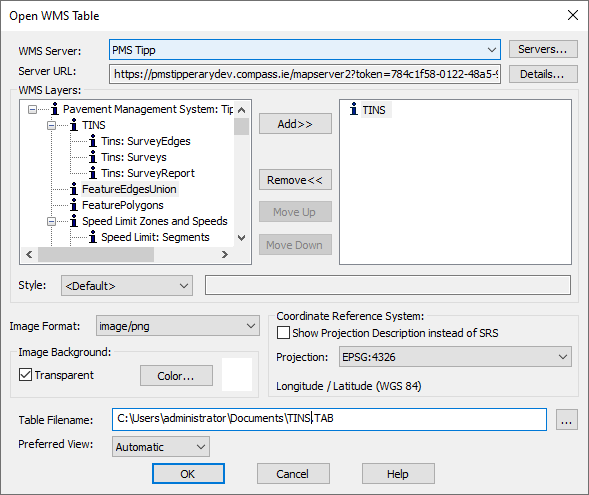
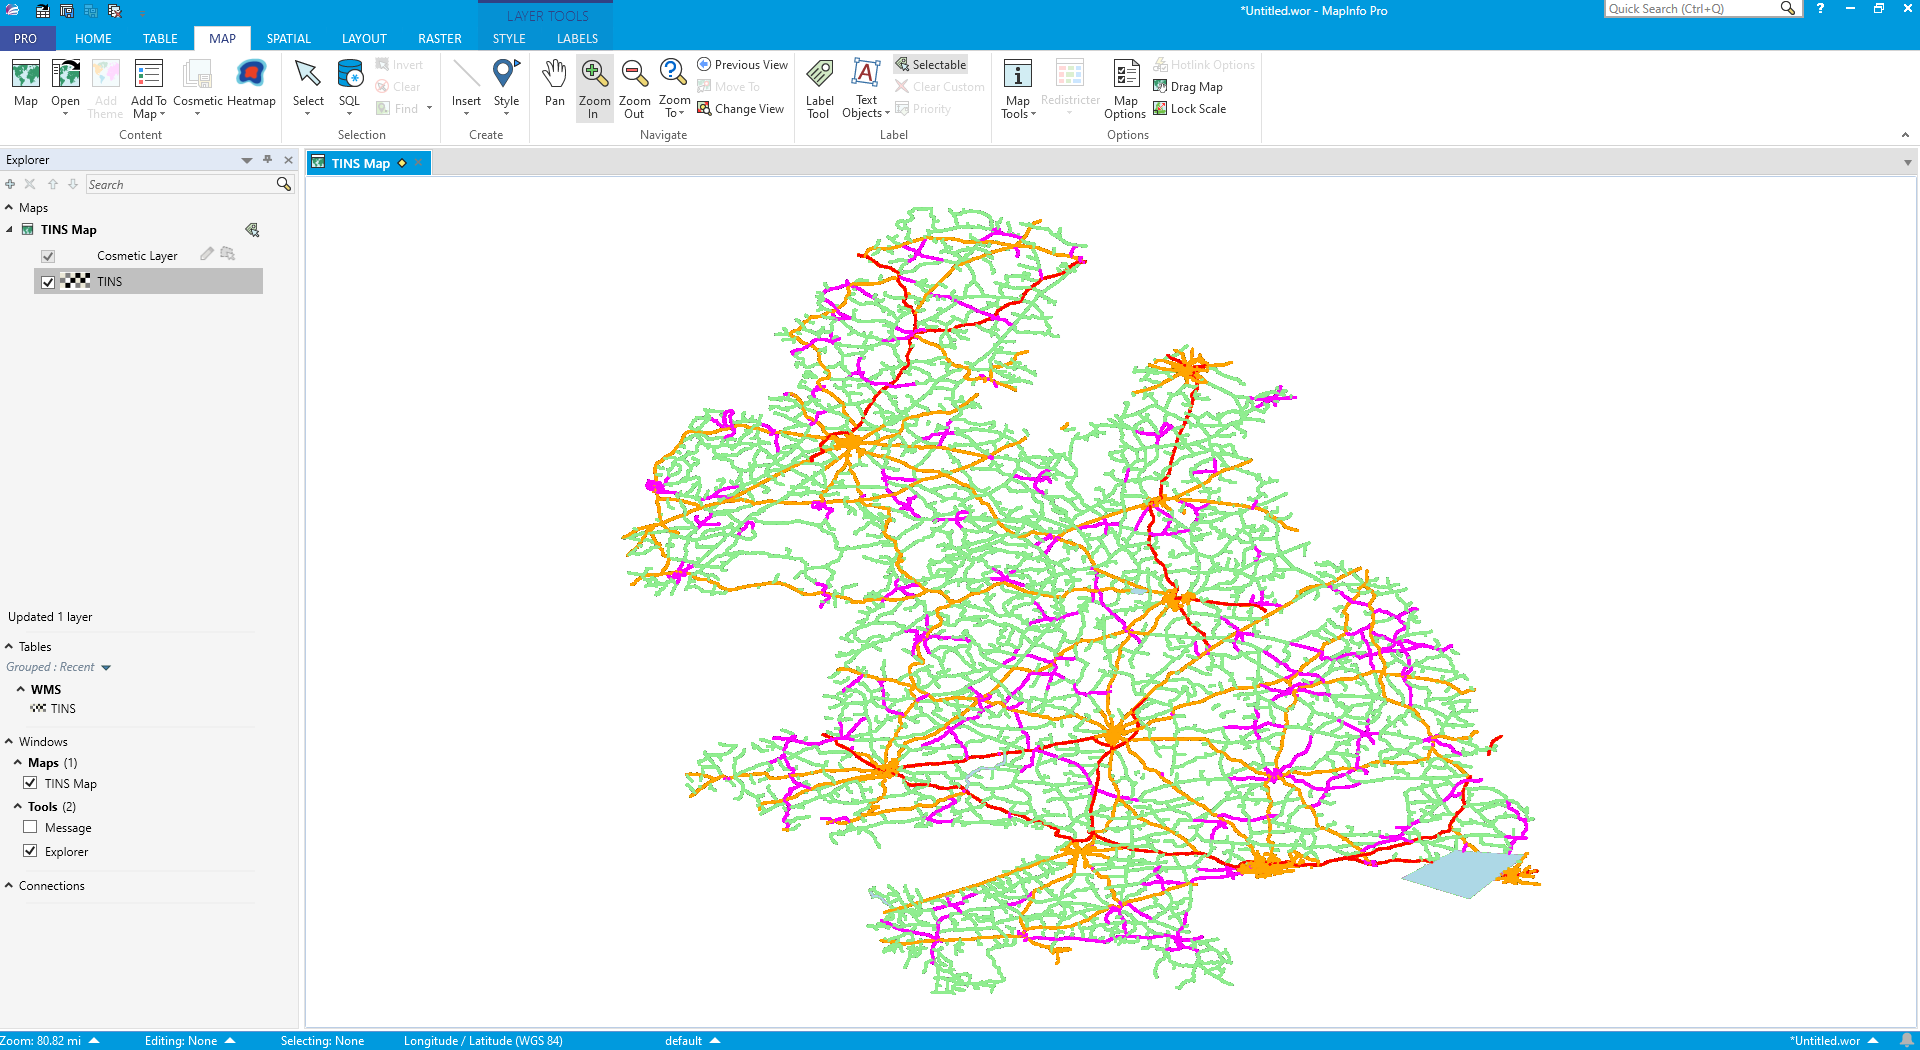
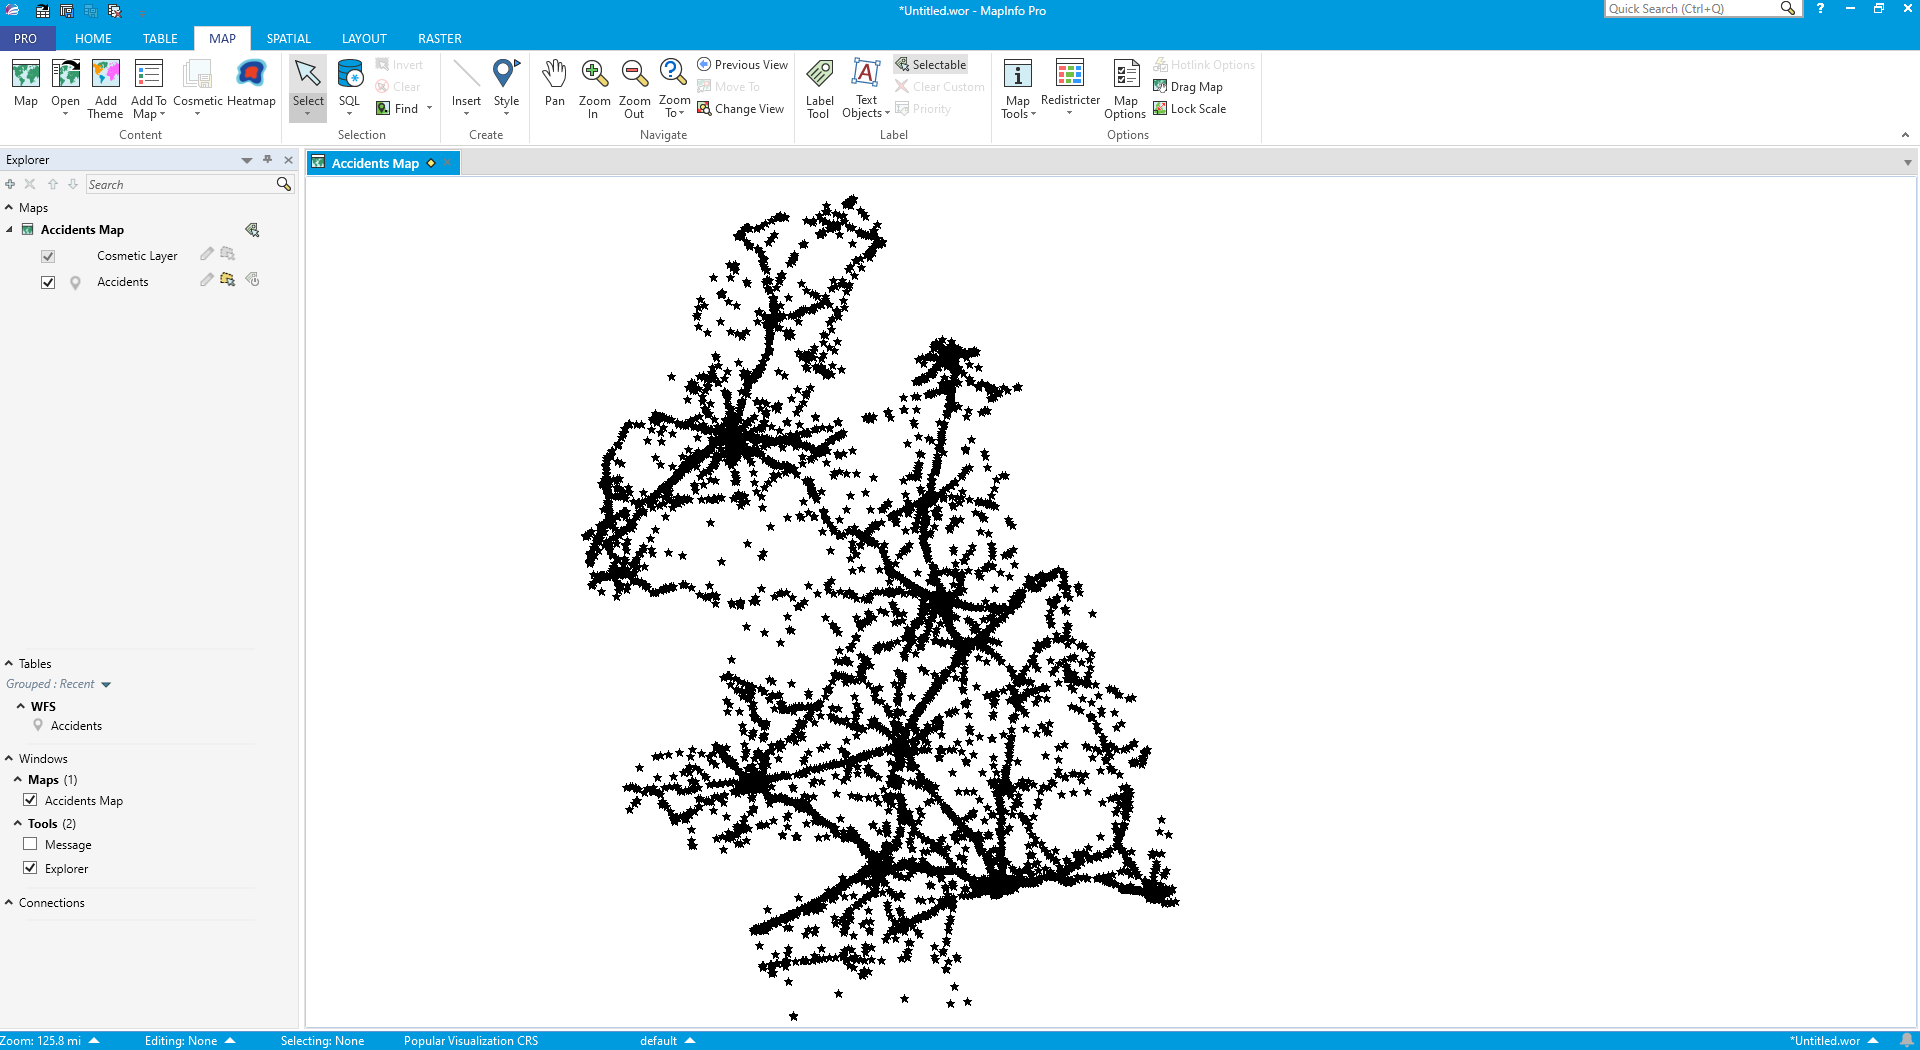
WMS raster layer is loaded to the display on the map.
MapInfo (WFS)
The MapInfo settings must be configured to connect to the WFS server prior to any connection parameters are set up.
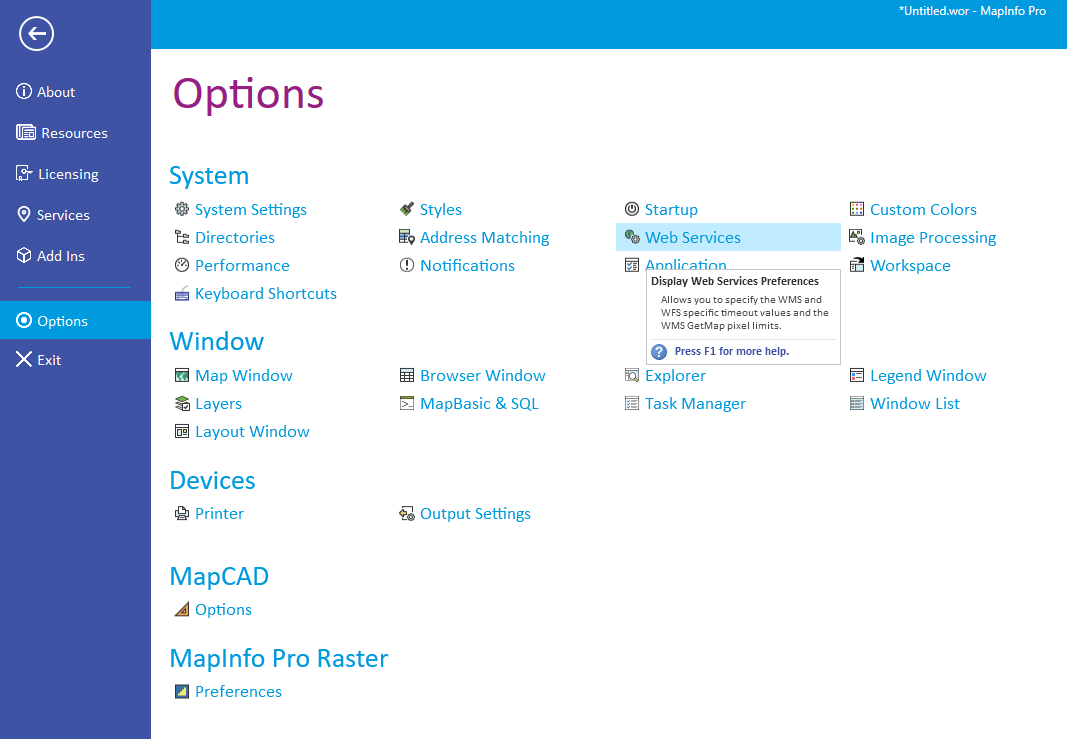
Select the Pro button on the toolbar ribbon.

Select options and open “Web Services”.
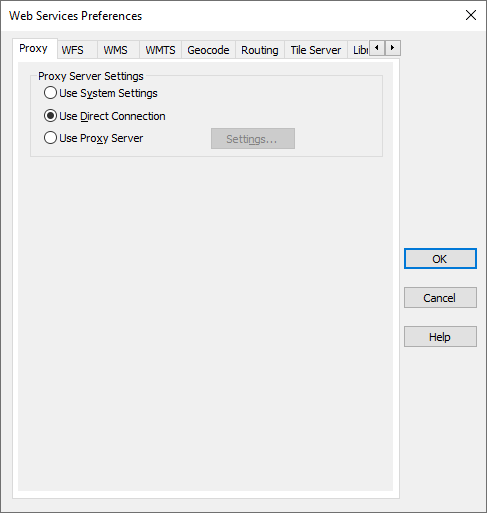
Under the Proxy options select “Use Direct Connection”.
Select OK and now Mapinfo is configured to access WFS connections.
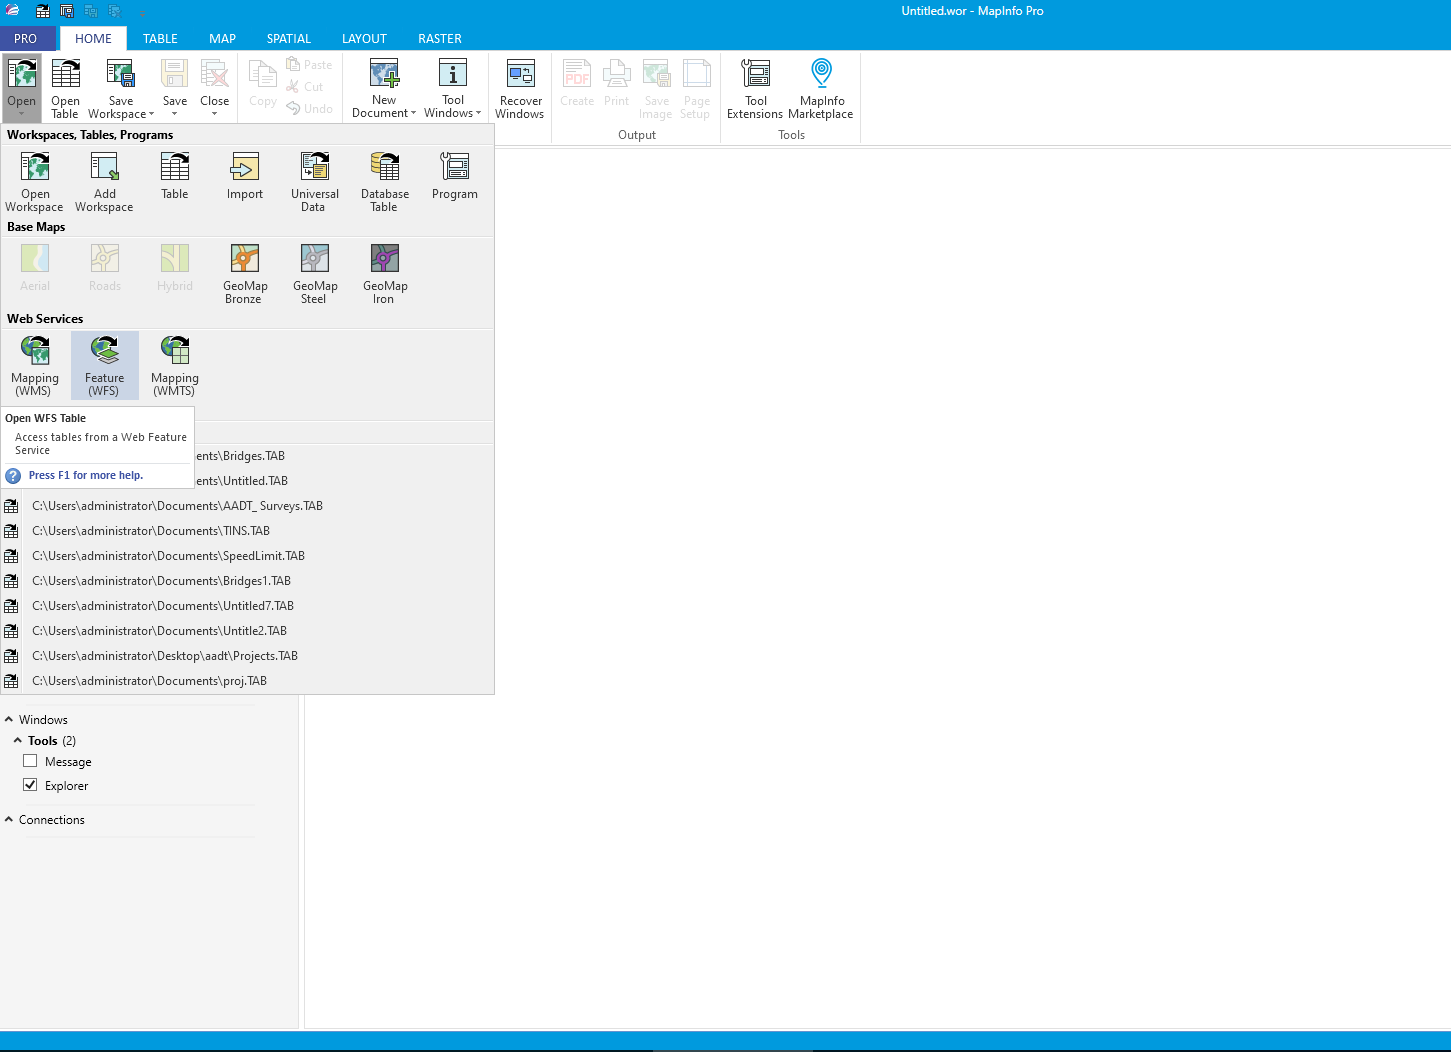
On the toolbar, click the Open drop-down list and select open WFS Table.
In the WFS connection dialogue, click on Servers…
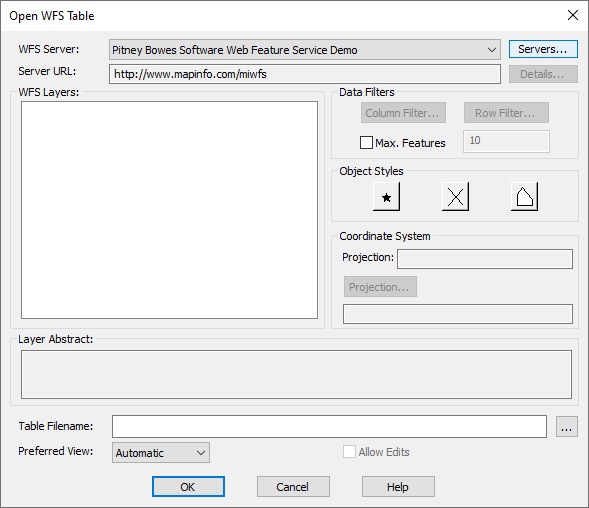
The WFS Server Connections dialog box appears. Select the add button to add a new WFS server.
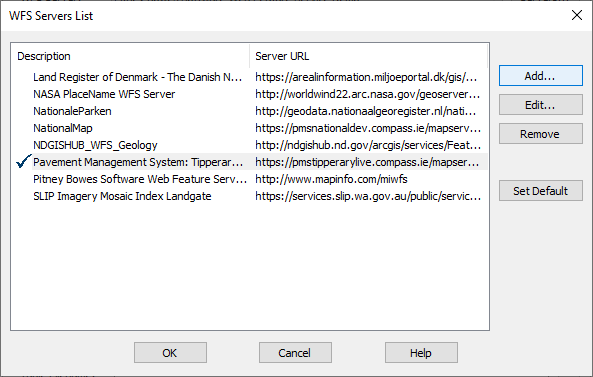
Enter the URL of the WFS server site you want to connect to in the Server URL text box. Enter a name for the server which will be displayed.
The WFS Server Connections dialog box appears with the WFS server and associated layers in the layer list.
Add all layers that are required and rename the table created.
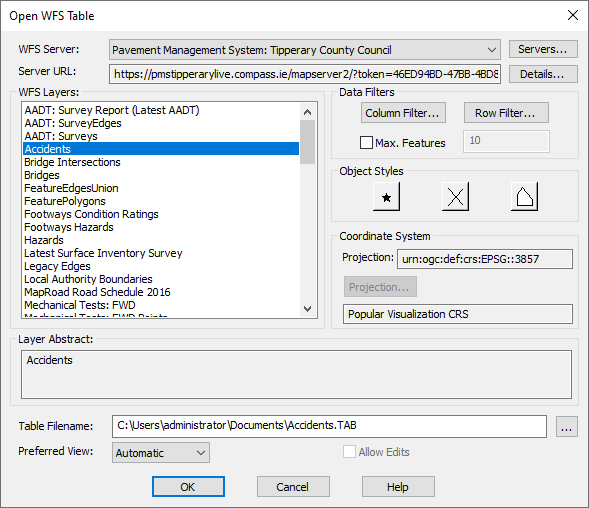
WFS feature layer is loaded to the display on the map.
FME Server (WMS)
On the toolbar, click the Open drop-down list and click open WMS.
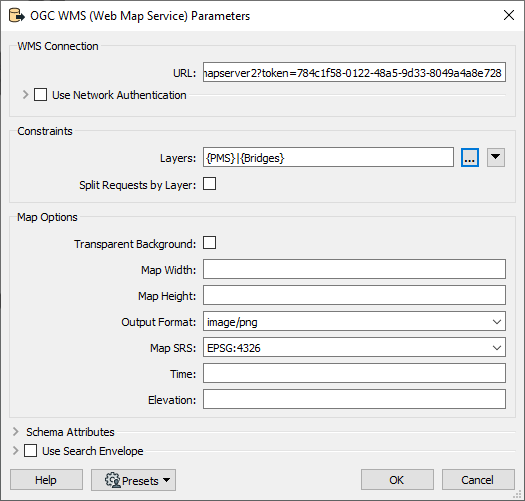
In the WMS connection parameters, select Layers…
The WMS Layer list dialog box appears. Tick the boxes of the layers required and select Ok.
Select Ok in the WMS Parameters dialogue box and the WMS Server Connections dialog box appears with the WMS server and associated layers in the layer list.
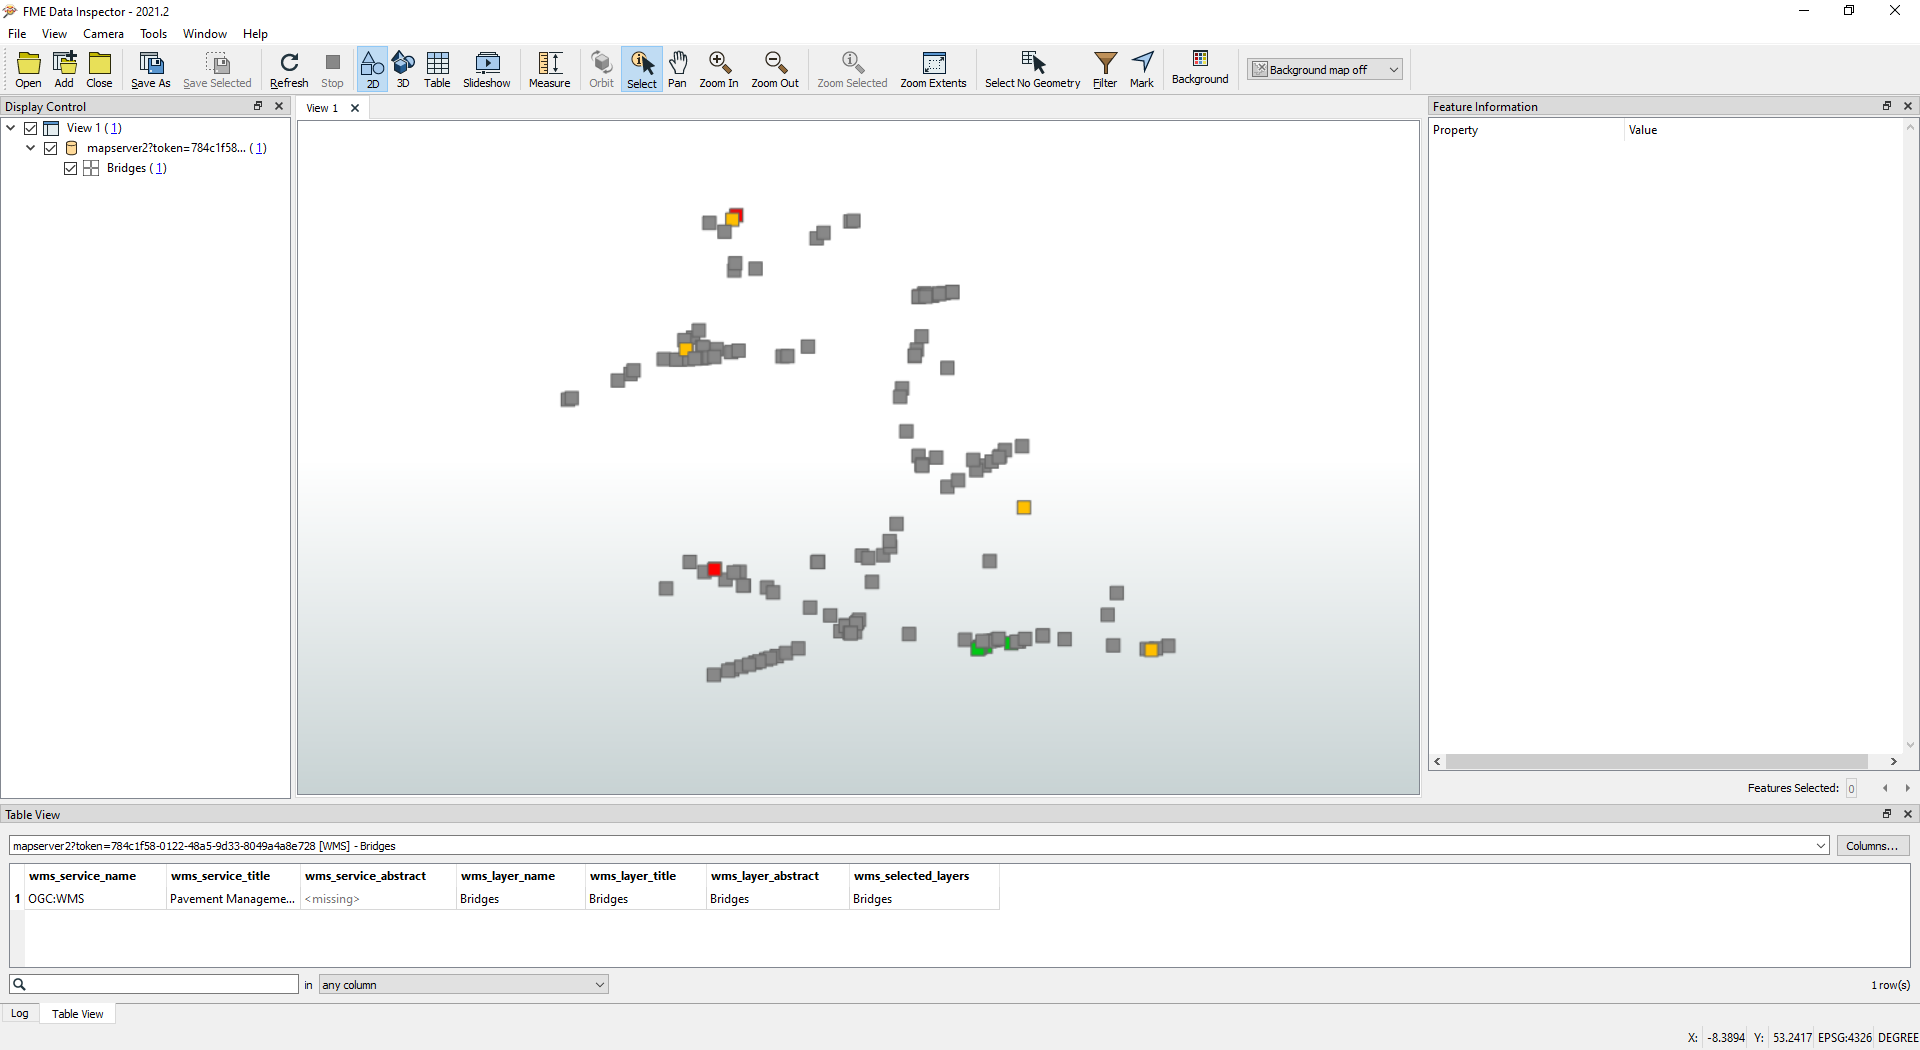
Raster images of the selected layers are displayed.
FME Server (WFS)
On the toolbar select Reader which opens up the add reader dialogue box.
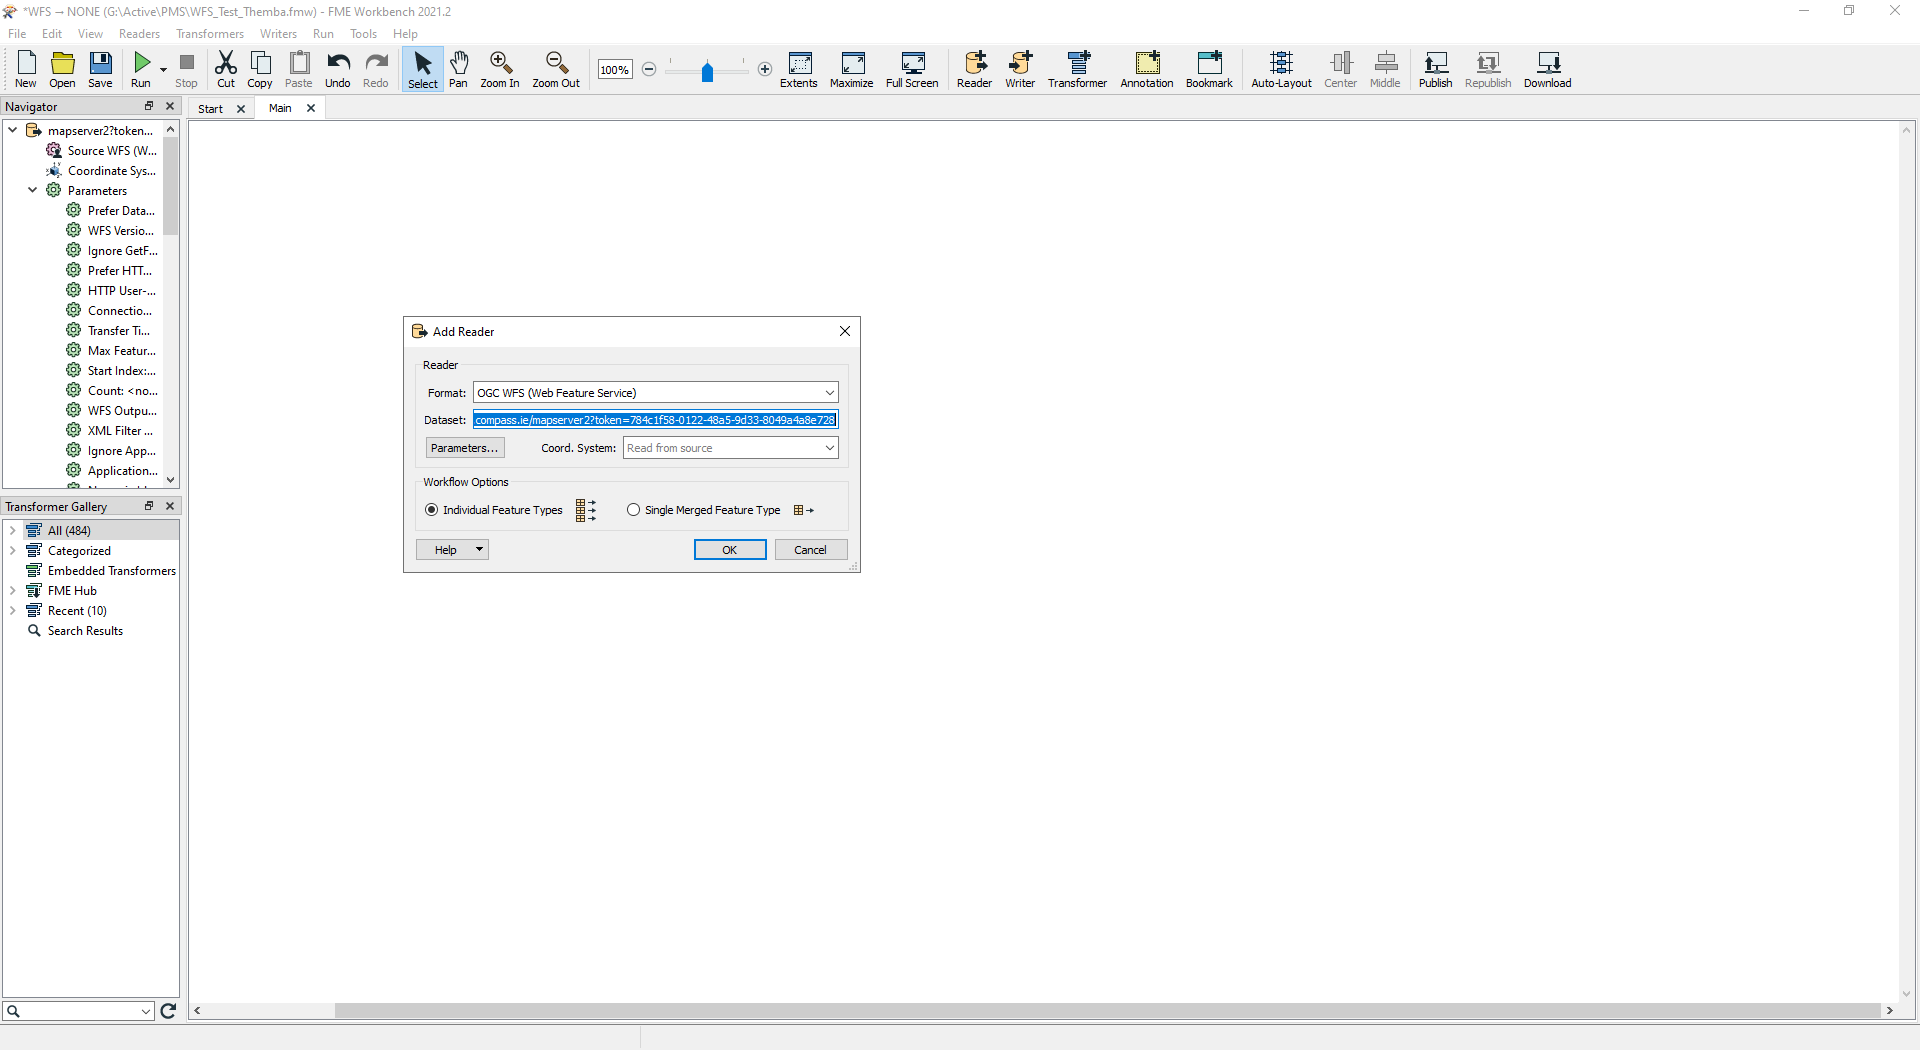
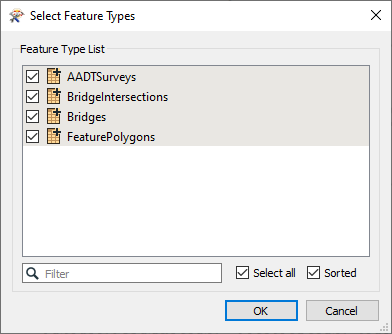
In the Add Reader dialogue box, Select Individual Feature Types and click on Parameters…
In the WFS connection parameters, select Feature Types…
Check the WFS version is set to 2.0.
Select the Workaround drop-down and check the Separate WFS v2.0 TYPENAMES with commas tick-box is selected.
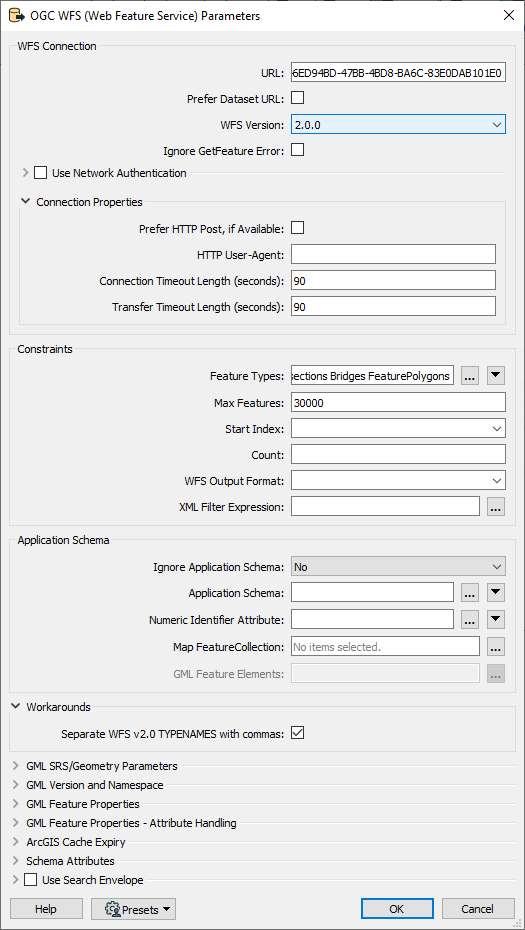
Tick all boxes of features to be added to the workspace and select Ok.
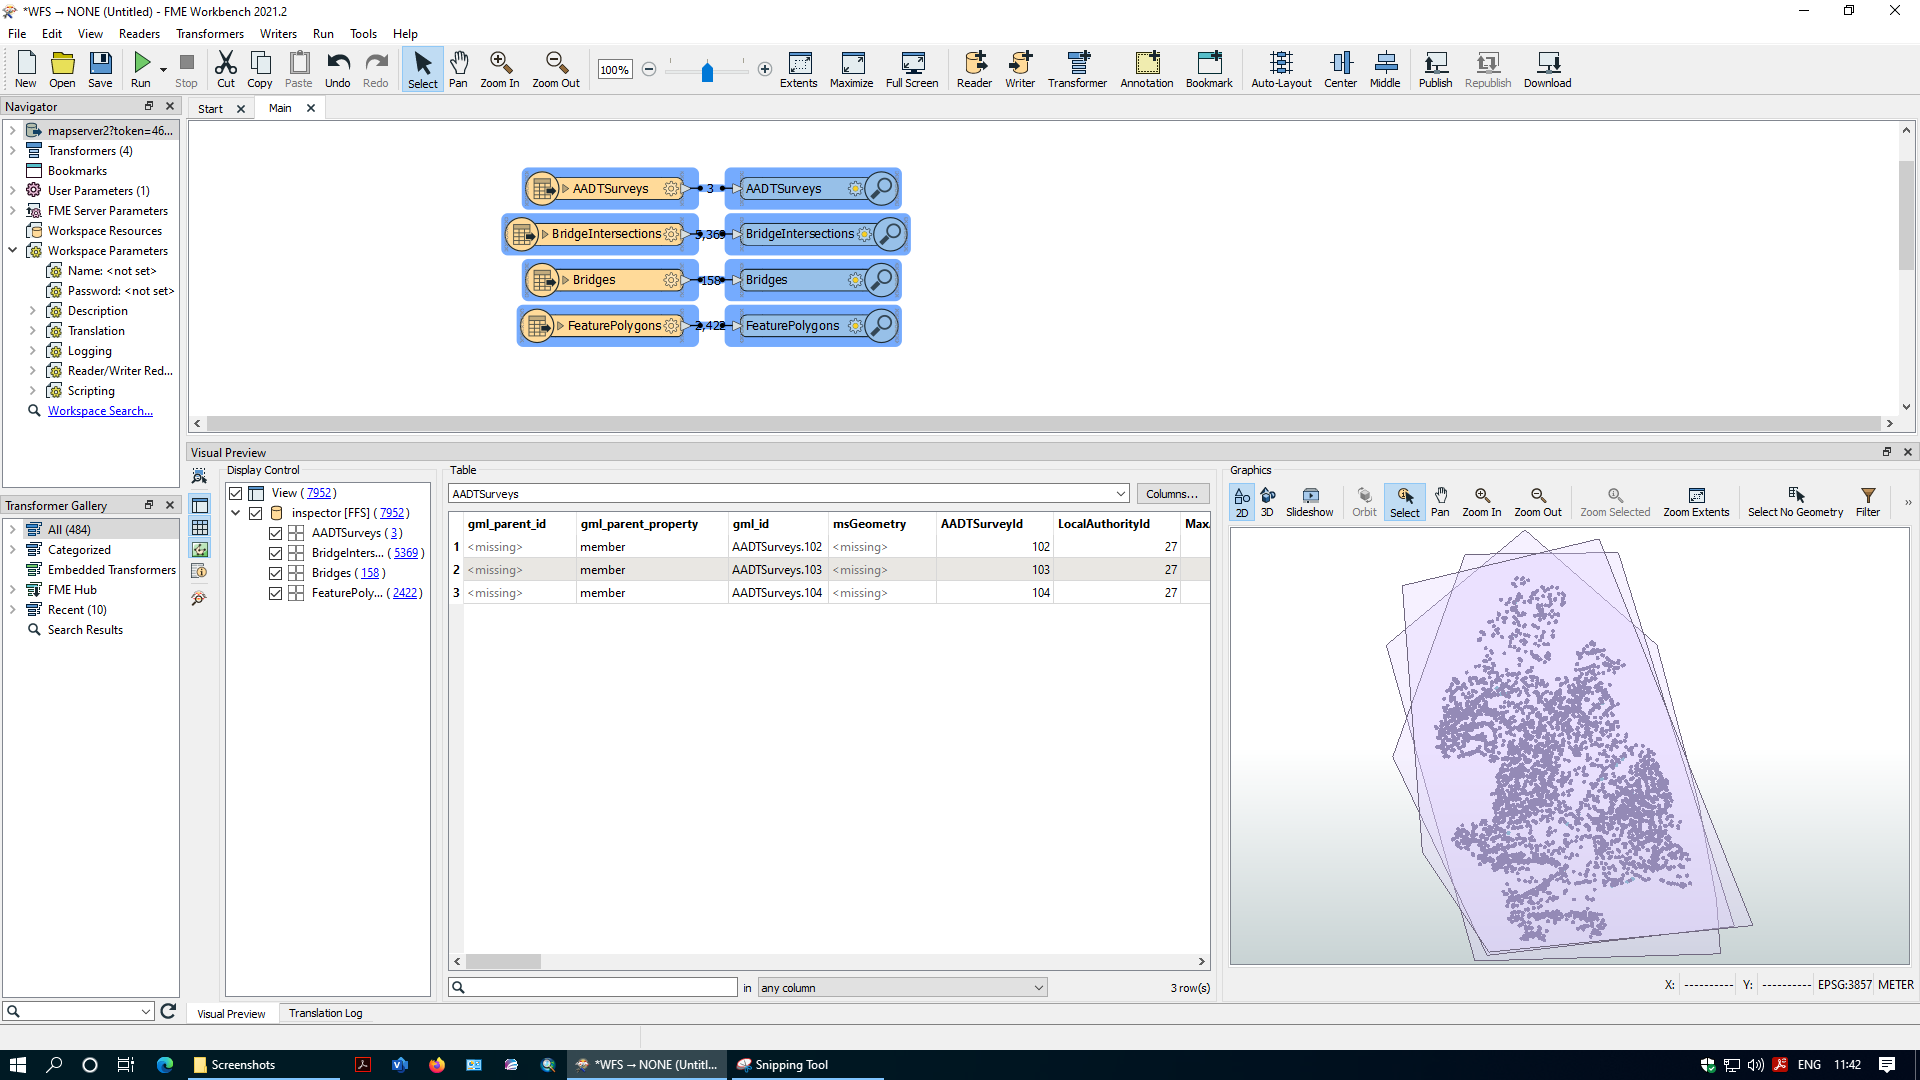
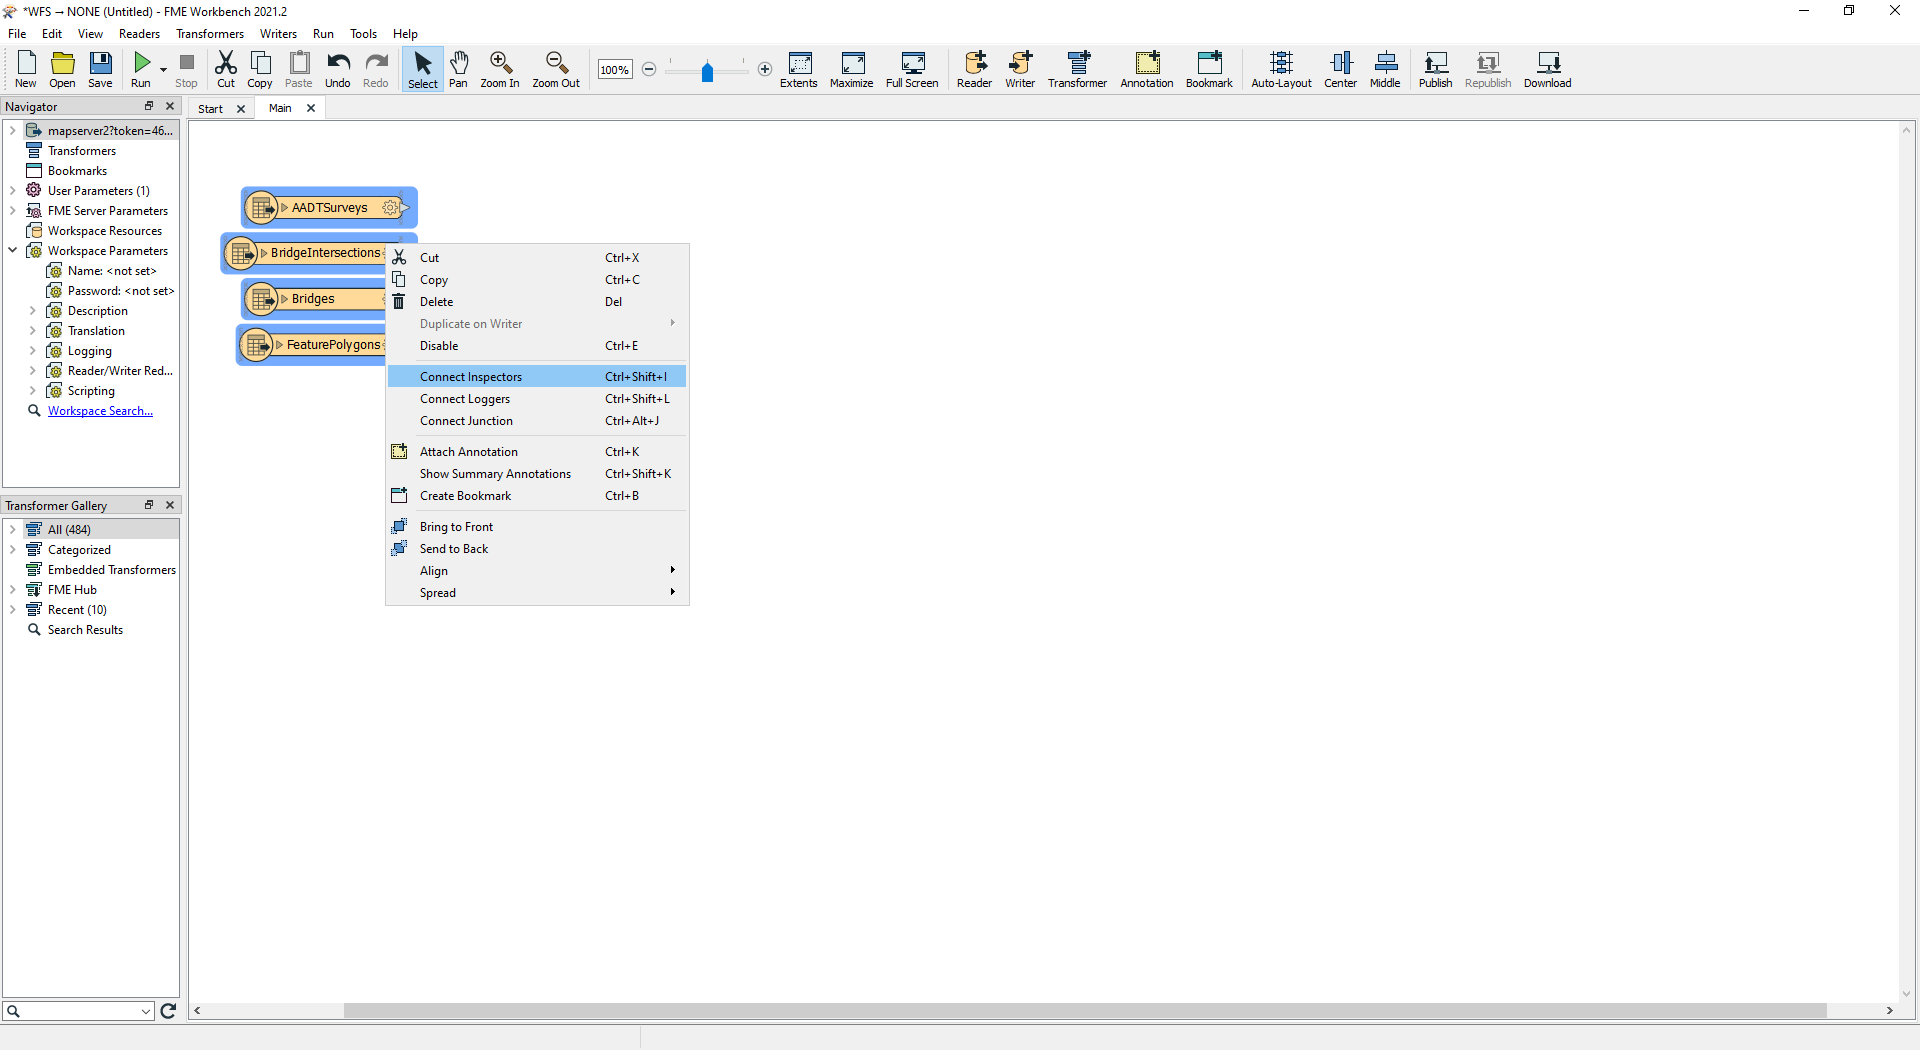
Highlight the selected features and Right-Click to open the drop-down menu. Select Connect Inspector.
Highlight the selected features and select Run Workspace in the Run drop-down menu.
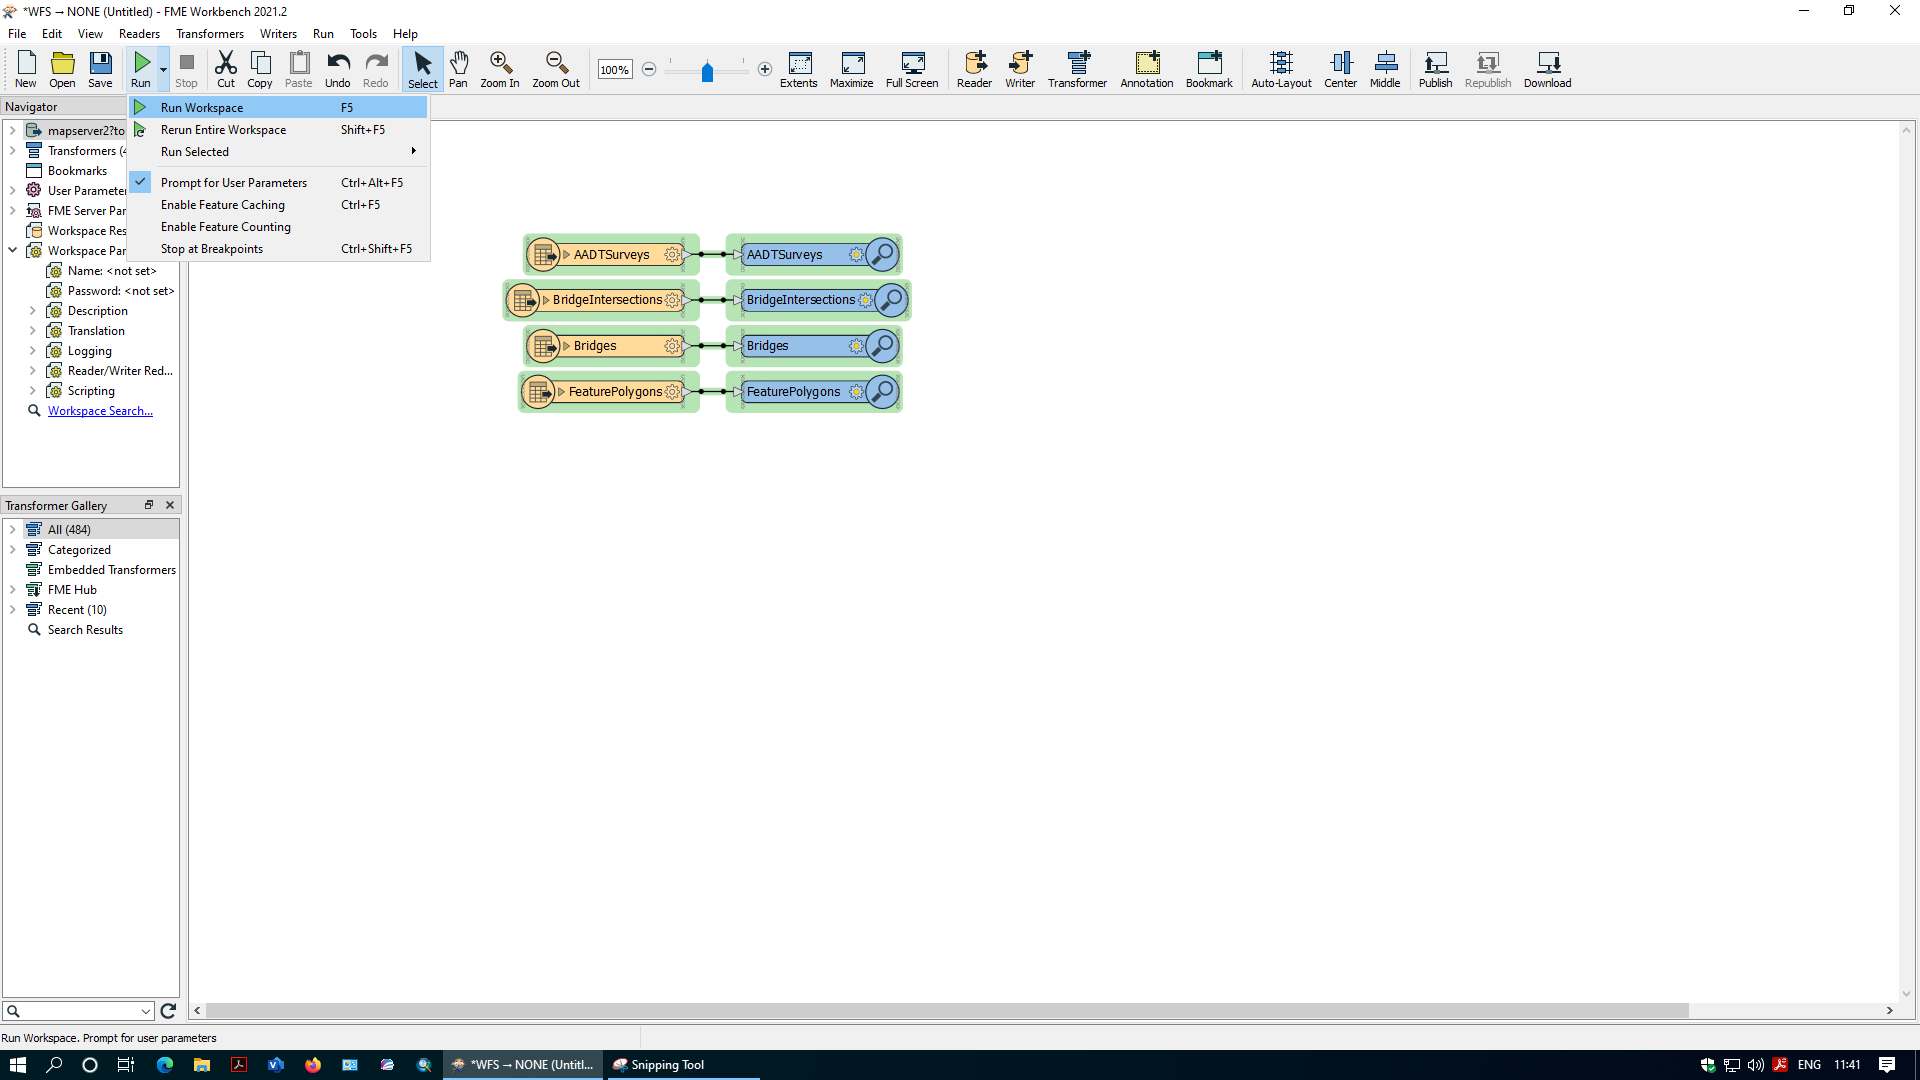
The selected layers are displayed by the data inspector and attribute table is opened.